Dr.Hess
-
Posts
4,809 -
Joined
-
Last visited


Dr.Hess's Achievements
0
Reputation
-
Well, I hope it works out for you. Suing will only cost you time and money, even when you win. If he is a licensed contractor, you can threaten to complain to the state contracting authority or Attorney General, whatever, and that is some leverage, but that's about it. Next time, "when the job is done."
-
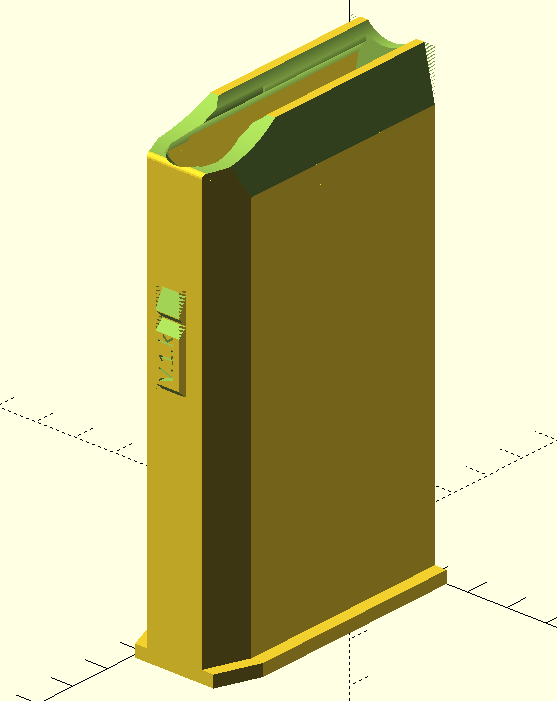
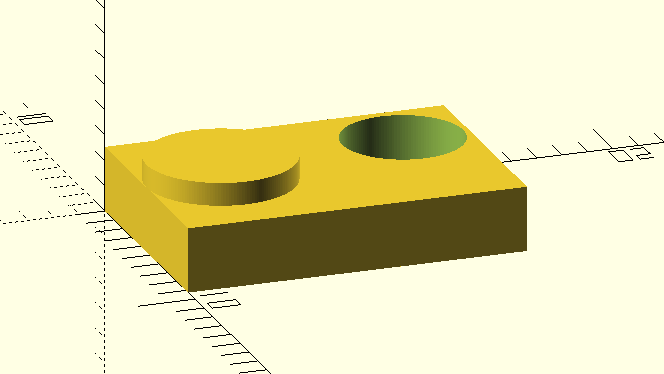
It does come in handy. The 3D CAD is not too bad. I started out 3D work with FreeCAD, which is sort of like a CAD program designed by 1000 monkeys banging on keyboards for 500 years until something compiled. Horrible. Then went to OpenSCAD, also free, went through the tutorial for about 5 lessons and was up and running on it. The above piece is pretty simple. One rectangle block, a cylinder sticking up, and subtract a cylinder for the hole. Just measure what you have or where it needs to go to get your dimensions. This is a magazine I drew up for my Howa 1500 mini: A lot more work.
-
Never pay contractors until the job is done. A draw at a half way point, or you buy materials, OK, but never pay up front. Learned that one the hard way. Fortunately, the Sheriff Deputy that came out was an excellent bully. And I mean that in a complimentary way. The contractor showed up the next day and started working. As the Deputy said: Never pay up front. That place has really come along. Love those fruit trees.
-
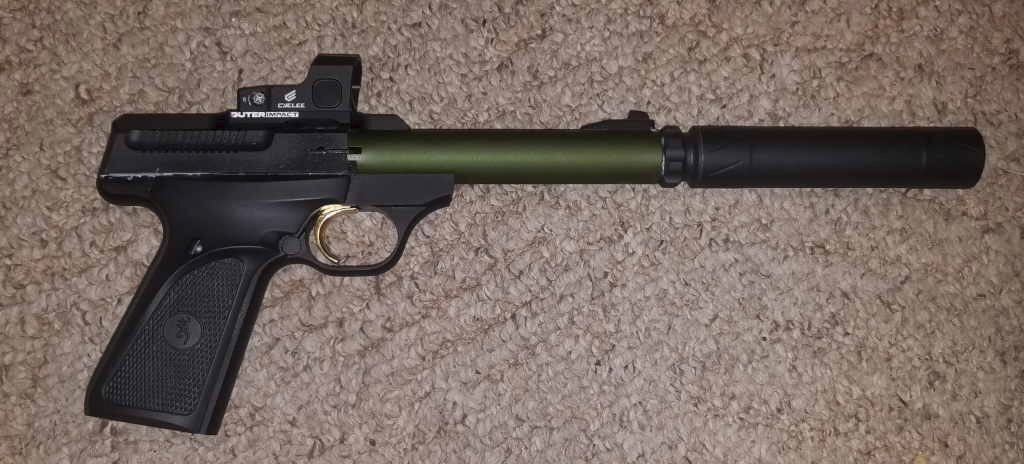
Some time ago (years, actually,) I bought a Browning Buck Mark. Used, of course. And of course it "had issues." Light primer strikes. My google-fu showed that was a common problem and had suggestions to fix it. I took it apart a couple years ago and did like they said, which was to enlarge the hole in the firing pin that a retaining split pin goes through. The theory being that the smaller hole prevented the pin from going forward enough to properly dent the rim. While I was in there, I also noted that there is a recoil buffer that was falling apart. Another common problem, it seems. I drew up and 3D printed one from ABS. Getting it all back together, it still had problems. Light hits. I sort of walked away from it for a while. Well, looking at this thing, and given the money I have in it (original purchase, new threaded barrel, new top piece to hold a new red dot site,) and not having a functioning pistol, I decided to tear it apart again. My printed buffer was not holding up very well. Since the last time, I bought a new 3D printer, better than my old one. My new AnkerMake M5C will print nylon, PolyAmide with Glass Fiber or Carbon Fiber, etc. I set it up with bridge nylon and printed a new buffer. Much better than my old one could do with ABS. Then I got to looking at the hammer and firing pin arrangement. The hammer was hitting a burr on the frame. I filed that down a bit. The firing pin was going forward enough, but I don't think it was going back far enough. It only protruded from the back of the slide where it rides a very small amount. I enlarged the same pin hole in the other direction so the firing pin stuck out maybe 5 thousands or a bit more further back, giving the hammer more distance to get the thing moving and letting inertia take it from there. It took several tries, but it is finally working. I ran about a hundred rounds through it with zero light strikes. Woot! Buffer I made:

-

-
-

-

-

-

-

-

-

-

-