Bob58
-
Posts
188 -
Joined
-
Last visited
Content Type
Profiles
Forums
Events
Everything posted by Bob58
-
No, just a functional, very lightly used, 60-70's era medium-duty lathe I picked up for near-free. I don't have a lathe right now and thought this would be a good way to get started turning. I've torn it down and re-assembled it but now need to re-wire a donor motor and make a stand for it. I can't seem to pass up an opportunity to make something from nothing, or restore once-productive items to their earlier use, or even better, some alternative use. I believe all who frequent this forum have a similar affliction. The lathe would have been even more special if it were of an earlier vintage. I have an Atlas belt/disc sander from the 40's that I'm particularly fond of - I've ground numerous recoil pads and reshaped a similar number of stocks on that machine. I'm looking for some medium-duty wood turning tools if anybody has any laying around unused (cheap). Any condition will do. My plan is to learn by experience - grinding the tools periodically to experiment with various tip shapes, angles, curves, etc. and make my own handles.
-
Nice project. I've been sidetracked a little lately myself - but not to your magnitude. I came across an old wood lathe that I'm trying to scare up a few parts for as well as build a stand.
-
Perhaps you should consider handloading.
-
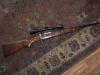
I saw this picture posted on a Swedish(?), perhaps Finnish site. I thought the rifle had an interesting forearm - certainly unconventional. This style would be very useful if you were trying to salvage a stock that you or someone else may have been overly aggressive in "hogging out" the upper barrel channel. I suppose the barrel is free floated. I'm gonna keep it in mind. I wish I could read the forum. No telling what it's about. http://www.jaktsnack.se/index.php?showtopic=17742
-
Thanks, I determined it was 308 win with go-no go guages.
-
I agree with Montea6b and z1r: No gaps means a good job. Your goal is very, very little clearance as if the handle melts into the wood. Test the fit frequently. Wait a minute... how old is this thread? Last post prior to ArkyHunter's post today was November 23, 2007!!! How embarassing for me to respond!! Arkyhunter, are you living in some parallel universe?
-
Impressive. I wish I had that talent. Most all of mine come from Home Depot.
-
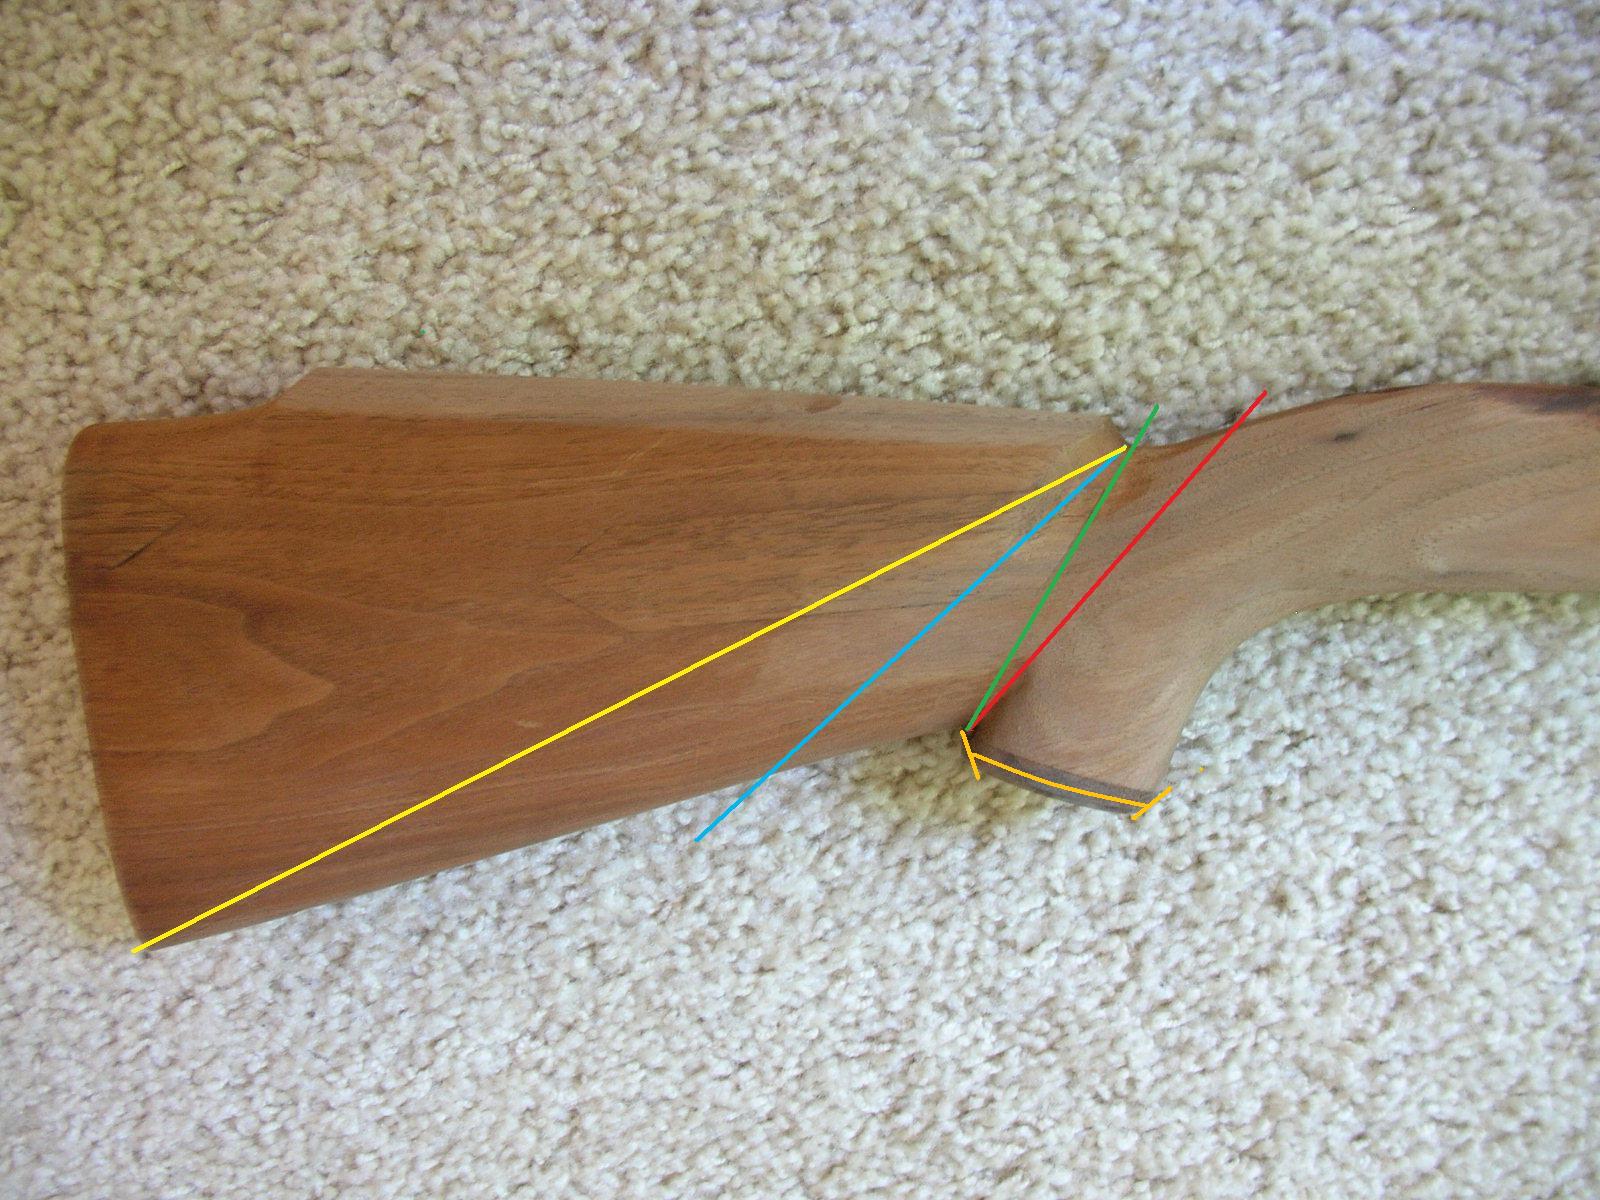
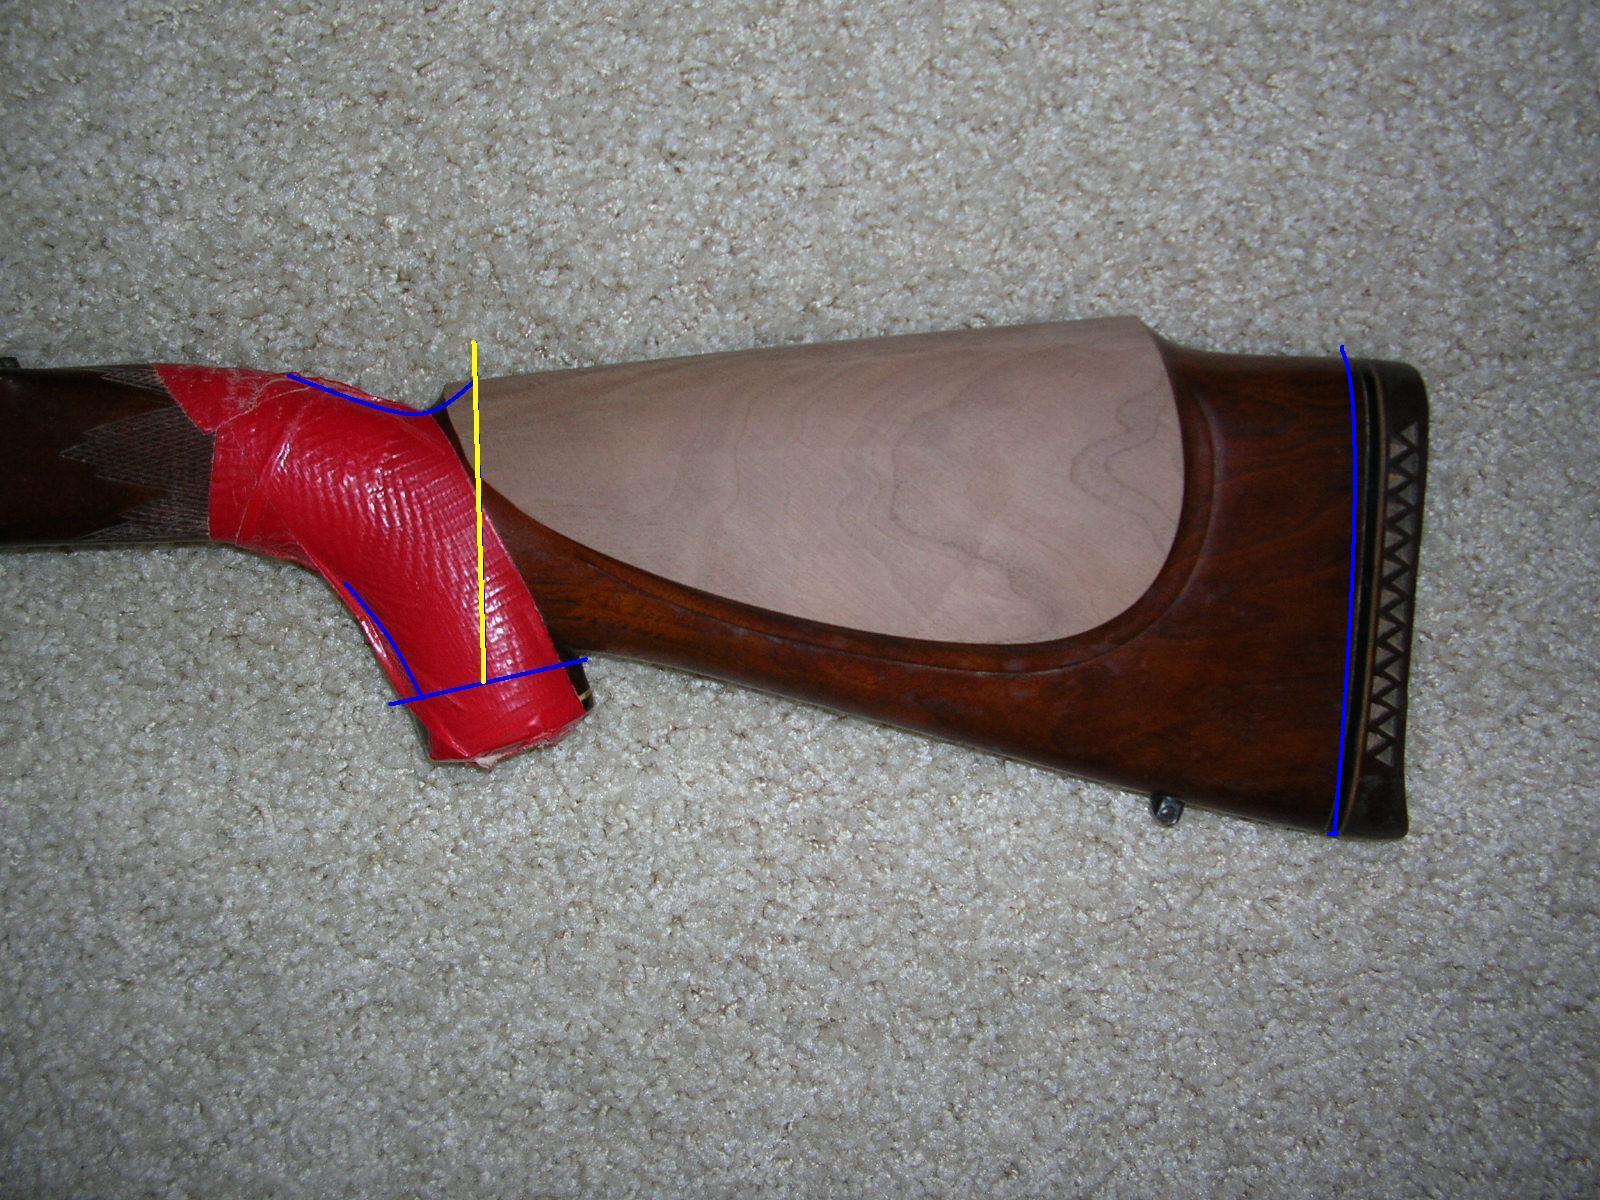
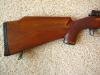
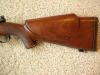
Brad, The yellow line would be the angle of the proposed left-side flute. I was not suggesting any further changes to the cheekpiece other than perhaps super-imposing a flute on it. Bob, (machinist1), I think you're probably right. There is no need for the flute on the left, just the cheekpiece. It looks fine as modified. Don't want to fix what is not broke especially if I'm reluctant. I'm thinking I'll just slightly enlarge and change the angle of the right flute, bevel the grip cap, do some overall sanding and not make any further stock modifications. Next steps will be to clean up the end of the buttstock (clean cut, 3" pitch?), install a recoil pad, re-checker, apply the finish, then call it a project. All that being said, I would still appreciate others' opinions on any element of this project and I still have plenty left to do.
-
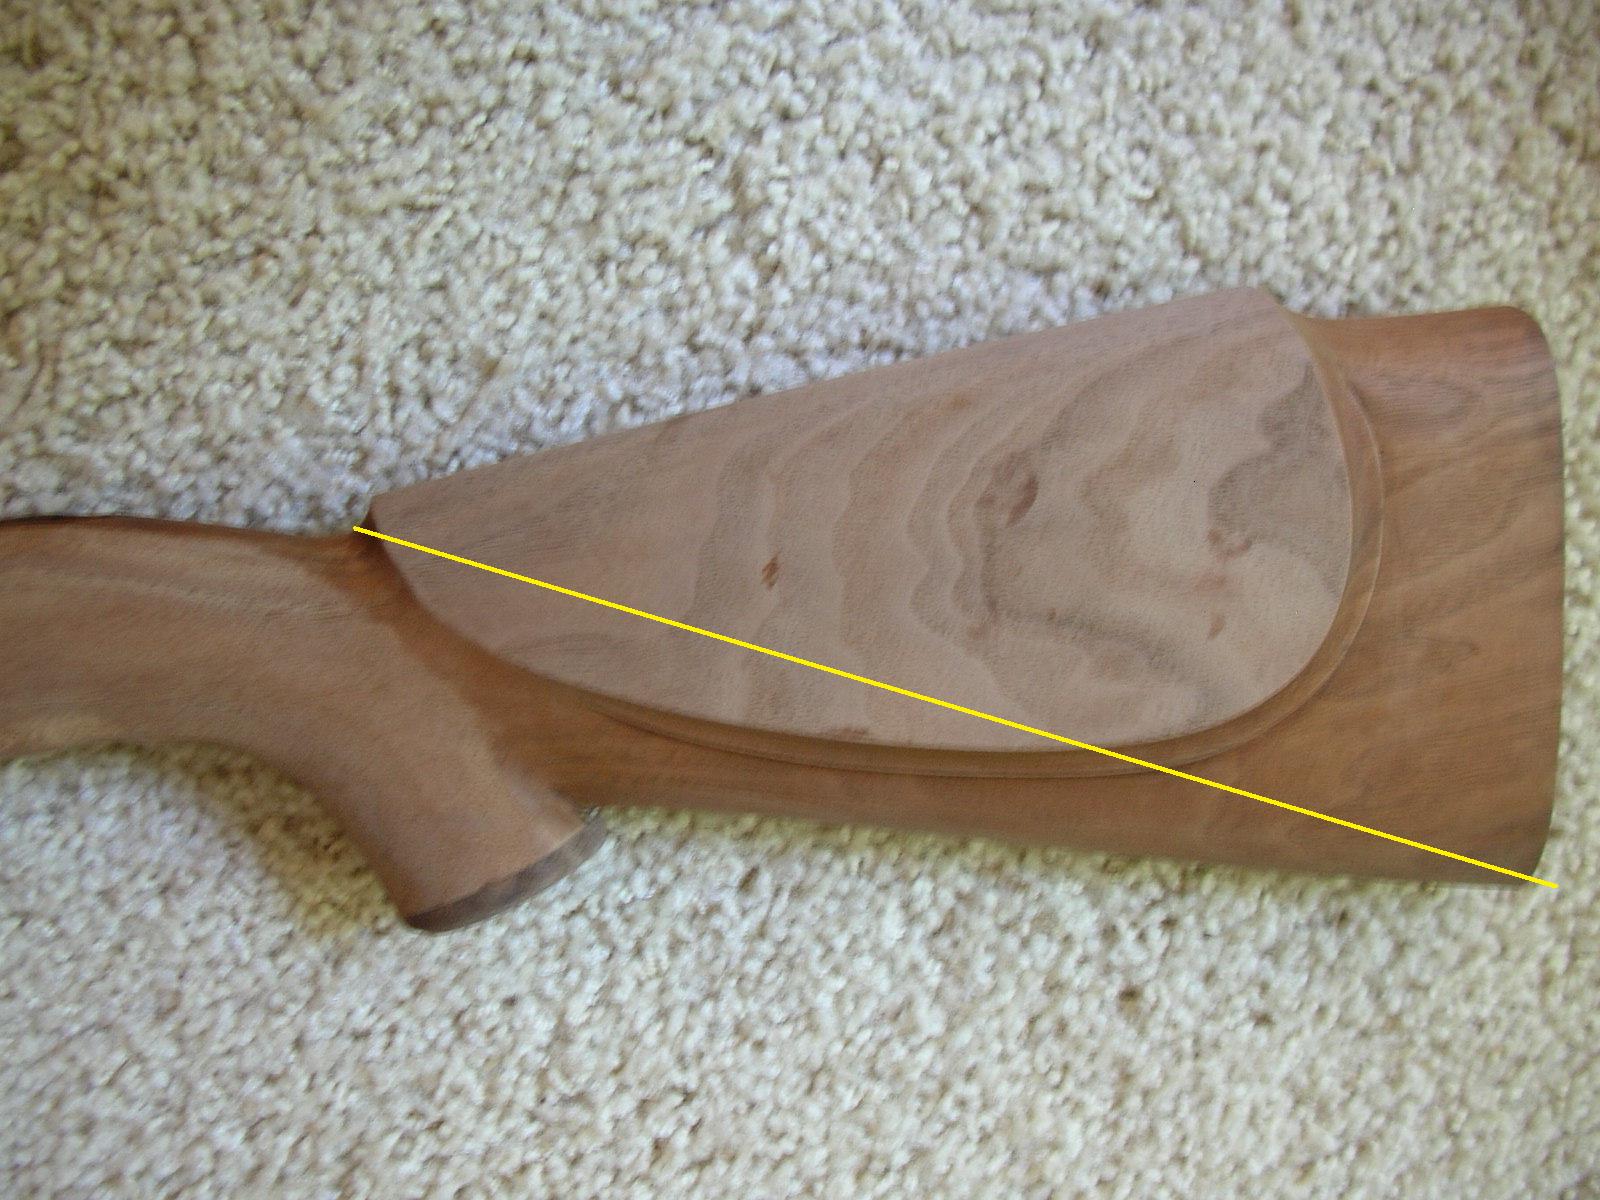
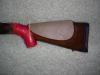
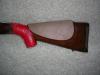
I've made some rough progress. The photos attached show both my progress and next steps simultaneously Progress: shortened the grip, installed a walnut grip cap, filed off the checkering, removed the recoil pad,and stripped the finish. Right Side/Next Steps / Concerns (first picture) Red line shows the original poor angle on lower, back grip that defines the grip too narrowly versus the more desirable green line that broadens the definition of the grip - nothing I can do about that but live with it, Blue line shows the original flute pointing down and toward the middle of the stock. the yellow line defines the more desirable flute line pointing to the toe. This angle is more correct and true to the angle of your thumb as it resides against the stock. I'll be defining a new, slightly larger flute toward the toe. It'll probably accept my thumb better. Orangish lines at grip cap indicate a more a refined bevel which will "lighten" the cap. I'm not removing any thicknes, just bevelling. Left Side/Next Steps / Concerns (fourth picture) Also included is a picture of the left side with a single yellow line defining the left flute angle. I'm challenged by the flute on this side. I kinda like it's current appearance without a flute and a little chicken to dive in and create one. There are so many intersecting lines here. I need to think about that side. I've ordered a Pachmayr Decelarator pad. Brad D I'll be using your matching pieces on a future project; the third piece you provided was too narrow for use here. I''ll also use it in the future. For comparison a couple original pictures are also attached (second and third pictures). Is there a trick to getting these pictures in the right order? I'm out of ideas on that cunundrum.

-
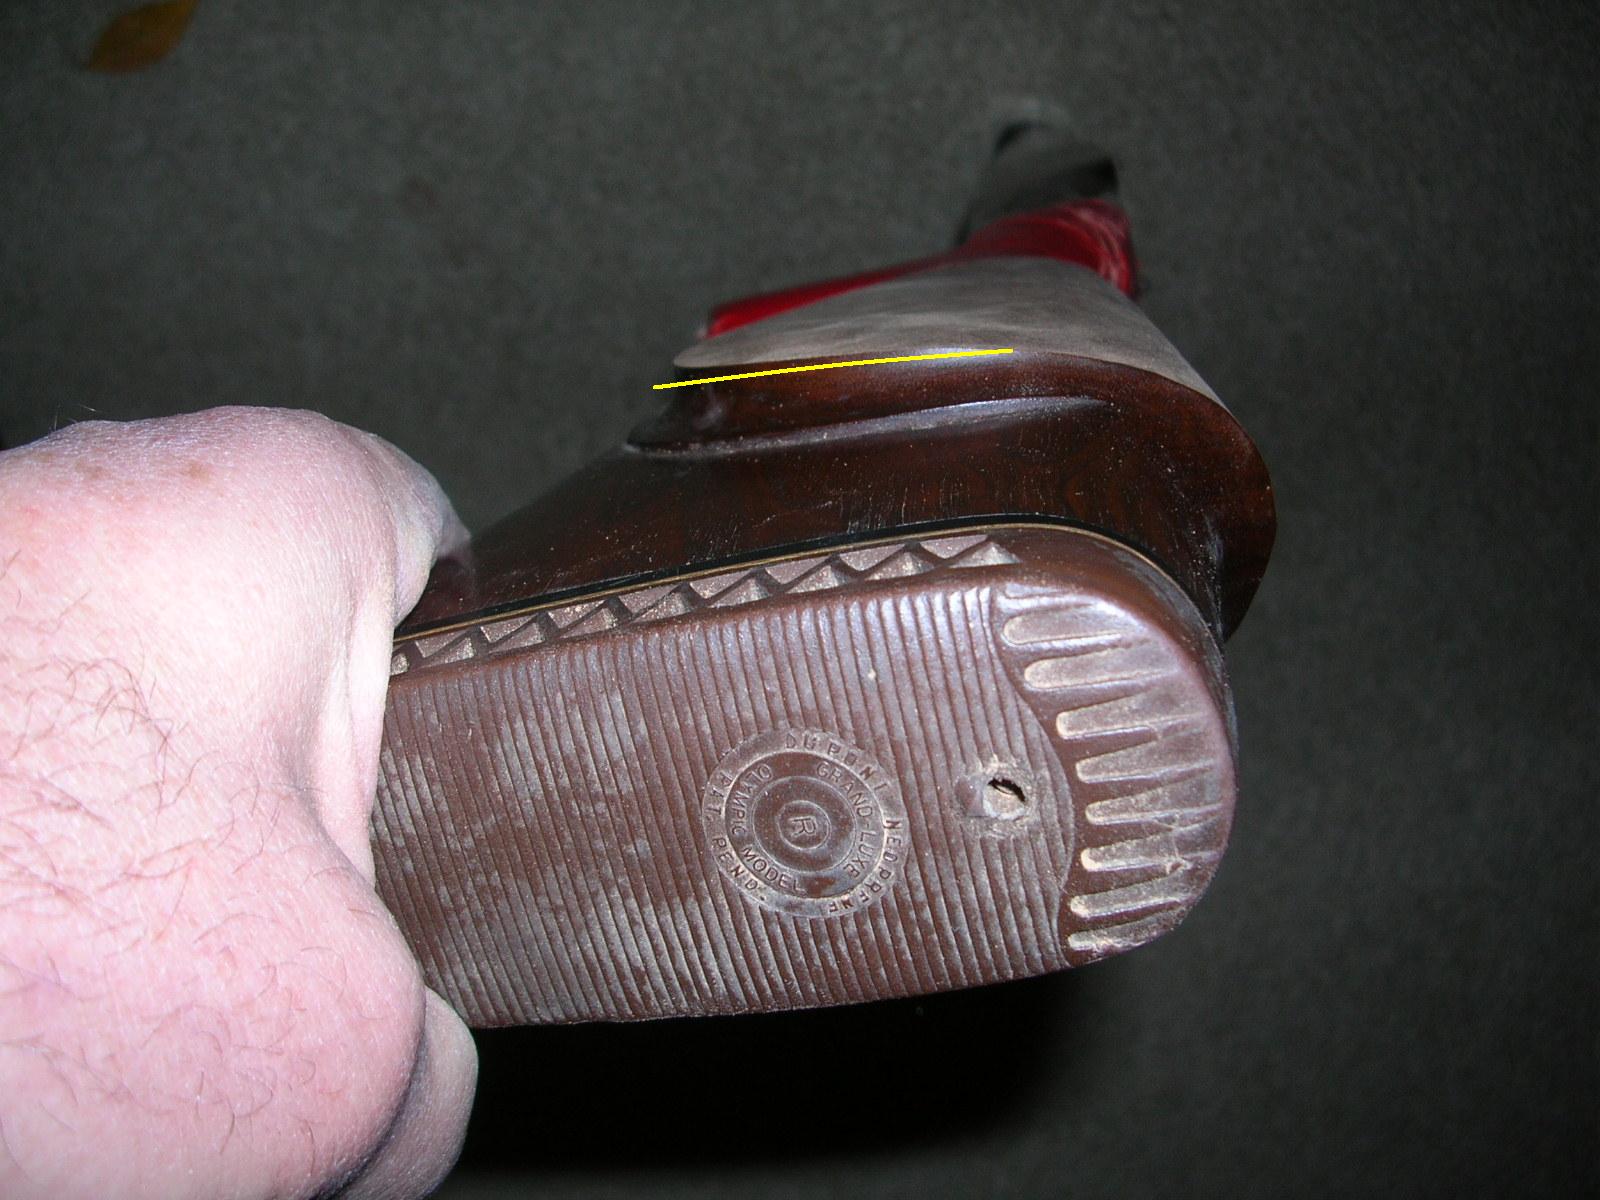
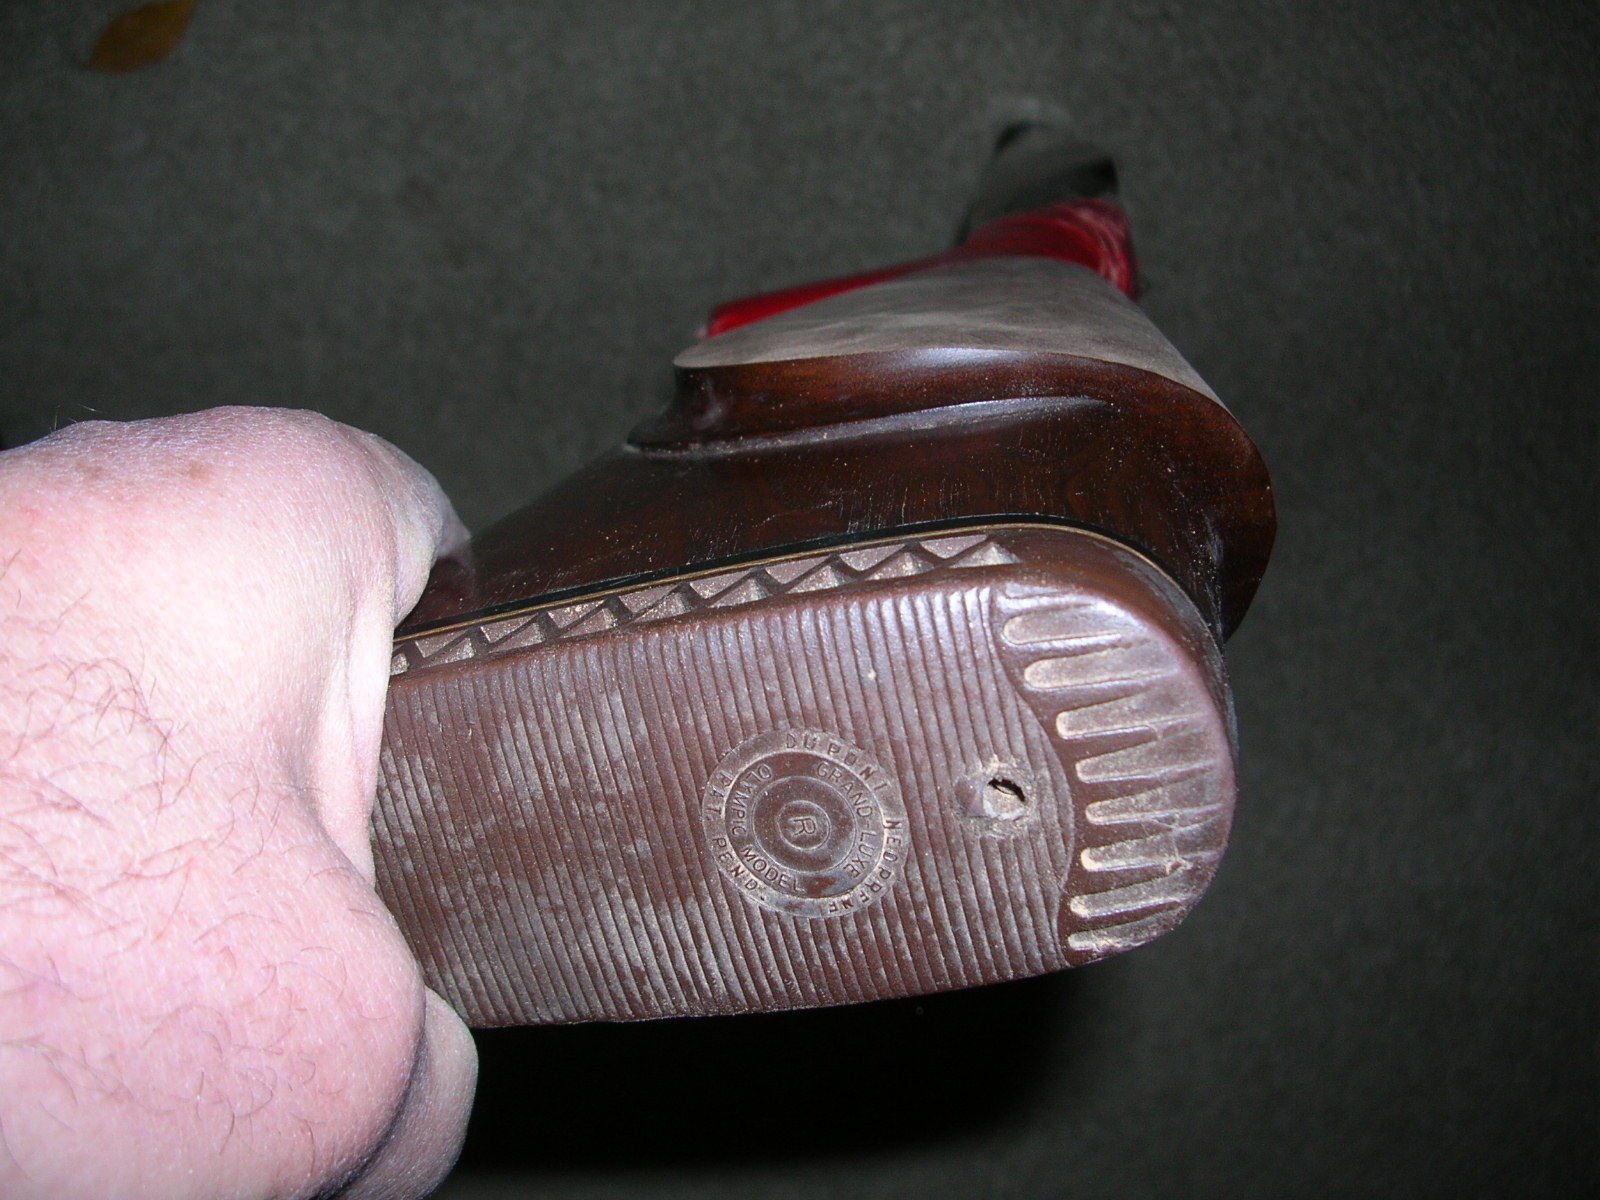
According to Sterling Davenport's book The Gun Digest Book of Riflesmithing pitch for a non-magnum, when measured on a 24 inch barrel should be 2-3.5 inches (page 200); and no more than 2.5 inches for magnums. I'll "shoot" for the middle of the recommended pitch for non-magnums (308win). I took the recoil pad off last night and also shortened the grip. The pad was glued on!! I'll be shaping and attaching the grip cap tonight. Pictures to follow when available.
-
Square like the green line -

-
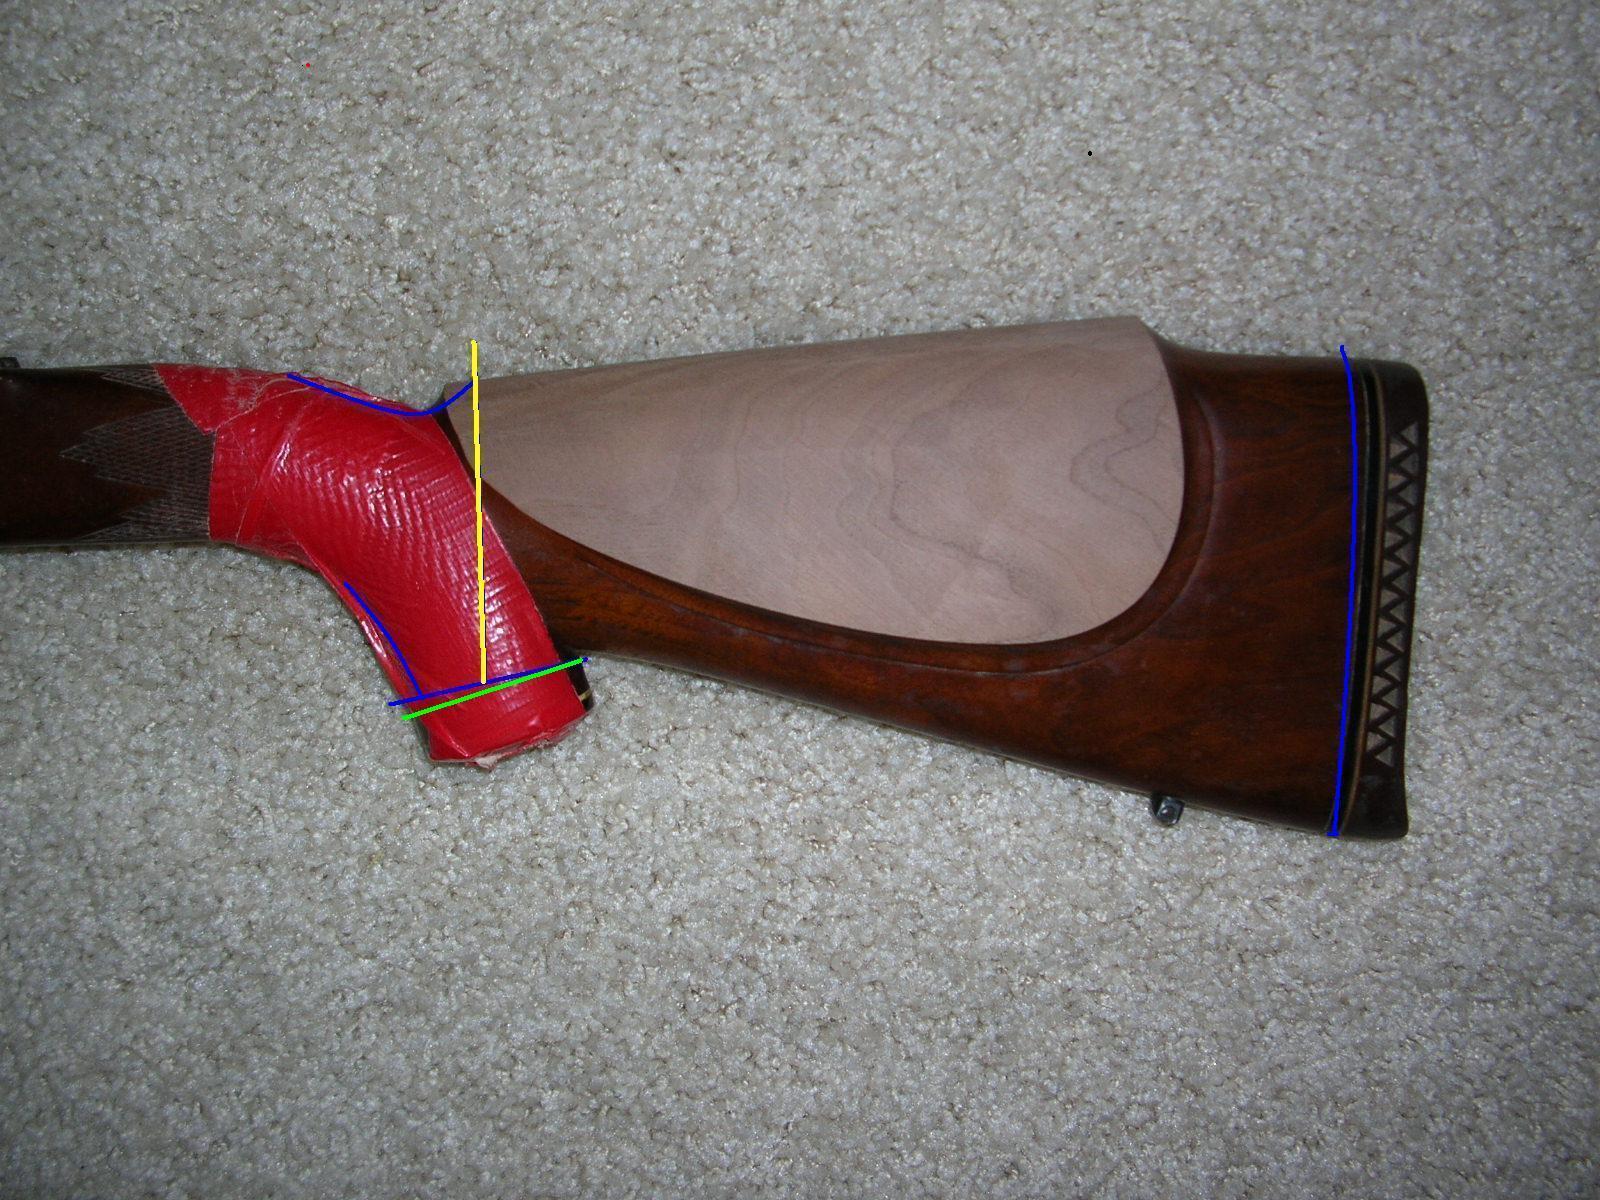
Brad, I thinkyou may have meant "So I would suggest bringing down the bottom the CHEEKPIECE some to more approach the thickness of the upper part." See the first pic with the yellow line shaving some thickness from the bottom of the cheekpiece - is that what you are suggesting? Also, in the second photo in blue, are my next steps: 1) shorten the grip and eventually install a grip cap, 2) bring the comb back, positioned over the middle of the shortened grip cap, and slightly "concave" the top of the grip, 3) PERHAPS, if there is enough meat, open the grip by shaving some of the front, and 4) slightly soften the pitch and eventually install a solid black recoil pad.

-
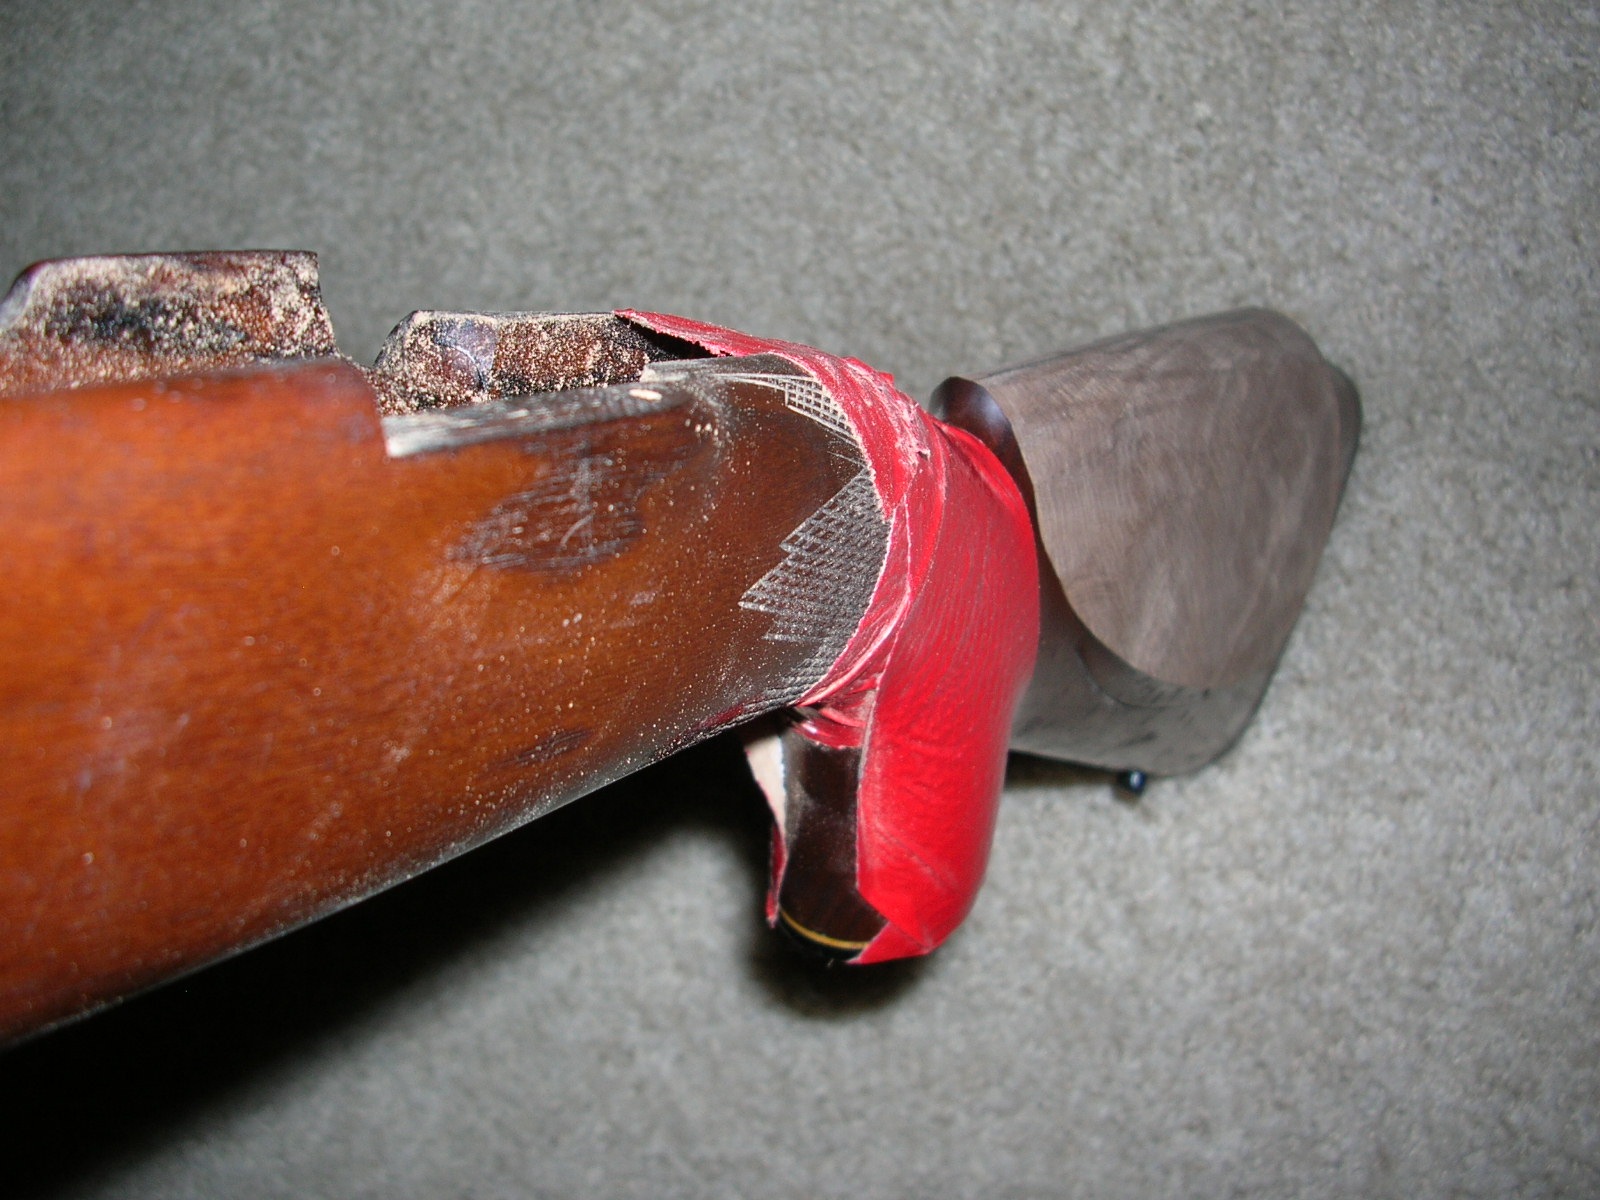
I took my first rough steps. I tapered the cheekpiece from back to front and lowered the top line and overall lightened it. I stopped and gave myself some time to figure out how to do the flutes and comb. That grip is really looking long with the cheekpiece smaller and with protective red duct tape. I may have lowered the comb a hair too much but I wanted it to work away from my cheek in recoil. Any suggestions on flute and comb are appreciated. So far, so good. Can't wait to whack off that grip. Yikes!

-
I like him, he's an Aggie '72
-
Walnut, The last several chapters of the book below has been my beginners guide as to what makes for simple, tasteful lines. It has helped me understand what visually to look for and provides some dimensional benchmarks. There is a custom Argentine 1909 on page 179 that is my standard against which all bolt action stocks are judged. I consider it to be near perfect and I use it as my benchmark - my only mods would be a slight decrease in the drop at comb and a simpler checkering pattern. Its most obvious attributes include: - radii, not corners or angles (an overall smoothness in forearm and buttstock features), - a very dark walnut, - softly contrasting wood (not solid black) tip and cap, - a solid, dark recoil pad, - a slightly open/medium grip, and - full checkering (both grip and forend) And one other feature not related to the stock that I find particularly appealing is the "in the white" militray bolt shroud. I'm not sure why I do. I suspect it has to do with how the shroud's "angular and mechanical" appearance contrasts with the wood's smoothness and dark color and the uneasy blending of metal and wood. I need to stop now... I'm beginning to embarass myself. http://www.alibris.com/booksearch?binding=...f+riflesmithing
-
Walnut and the current owner are right - trapped inside is a better looking stock. However that deep cut in the comb area could be a challenge. We should have an ugly stock contest. Everyone start with a butt-ugly stock and see who can make a silk purse from a sow's ear. After all, resurrection is the theme this weekend.
-
I feel like sticking needles in my eyes...
-
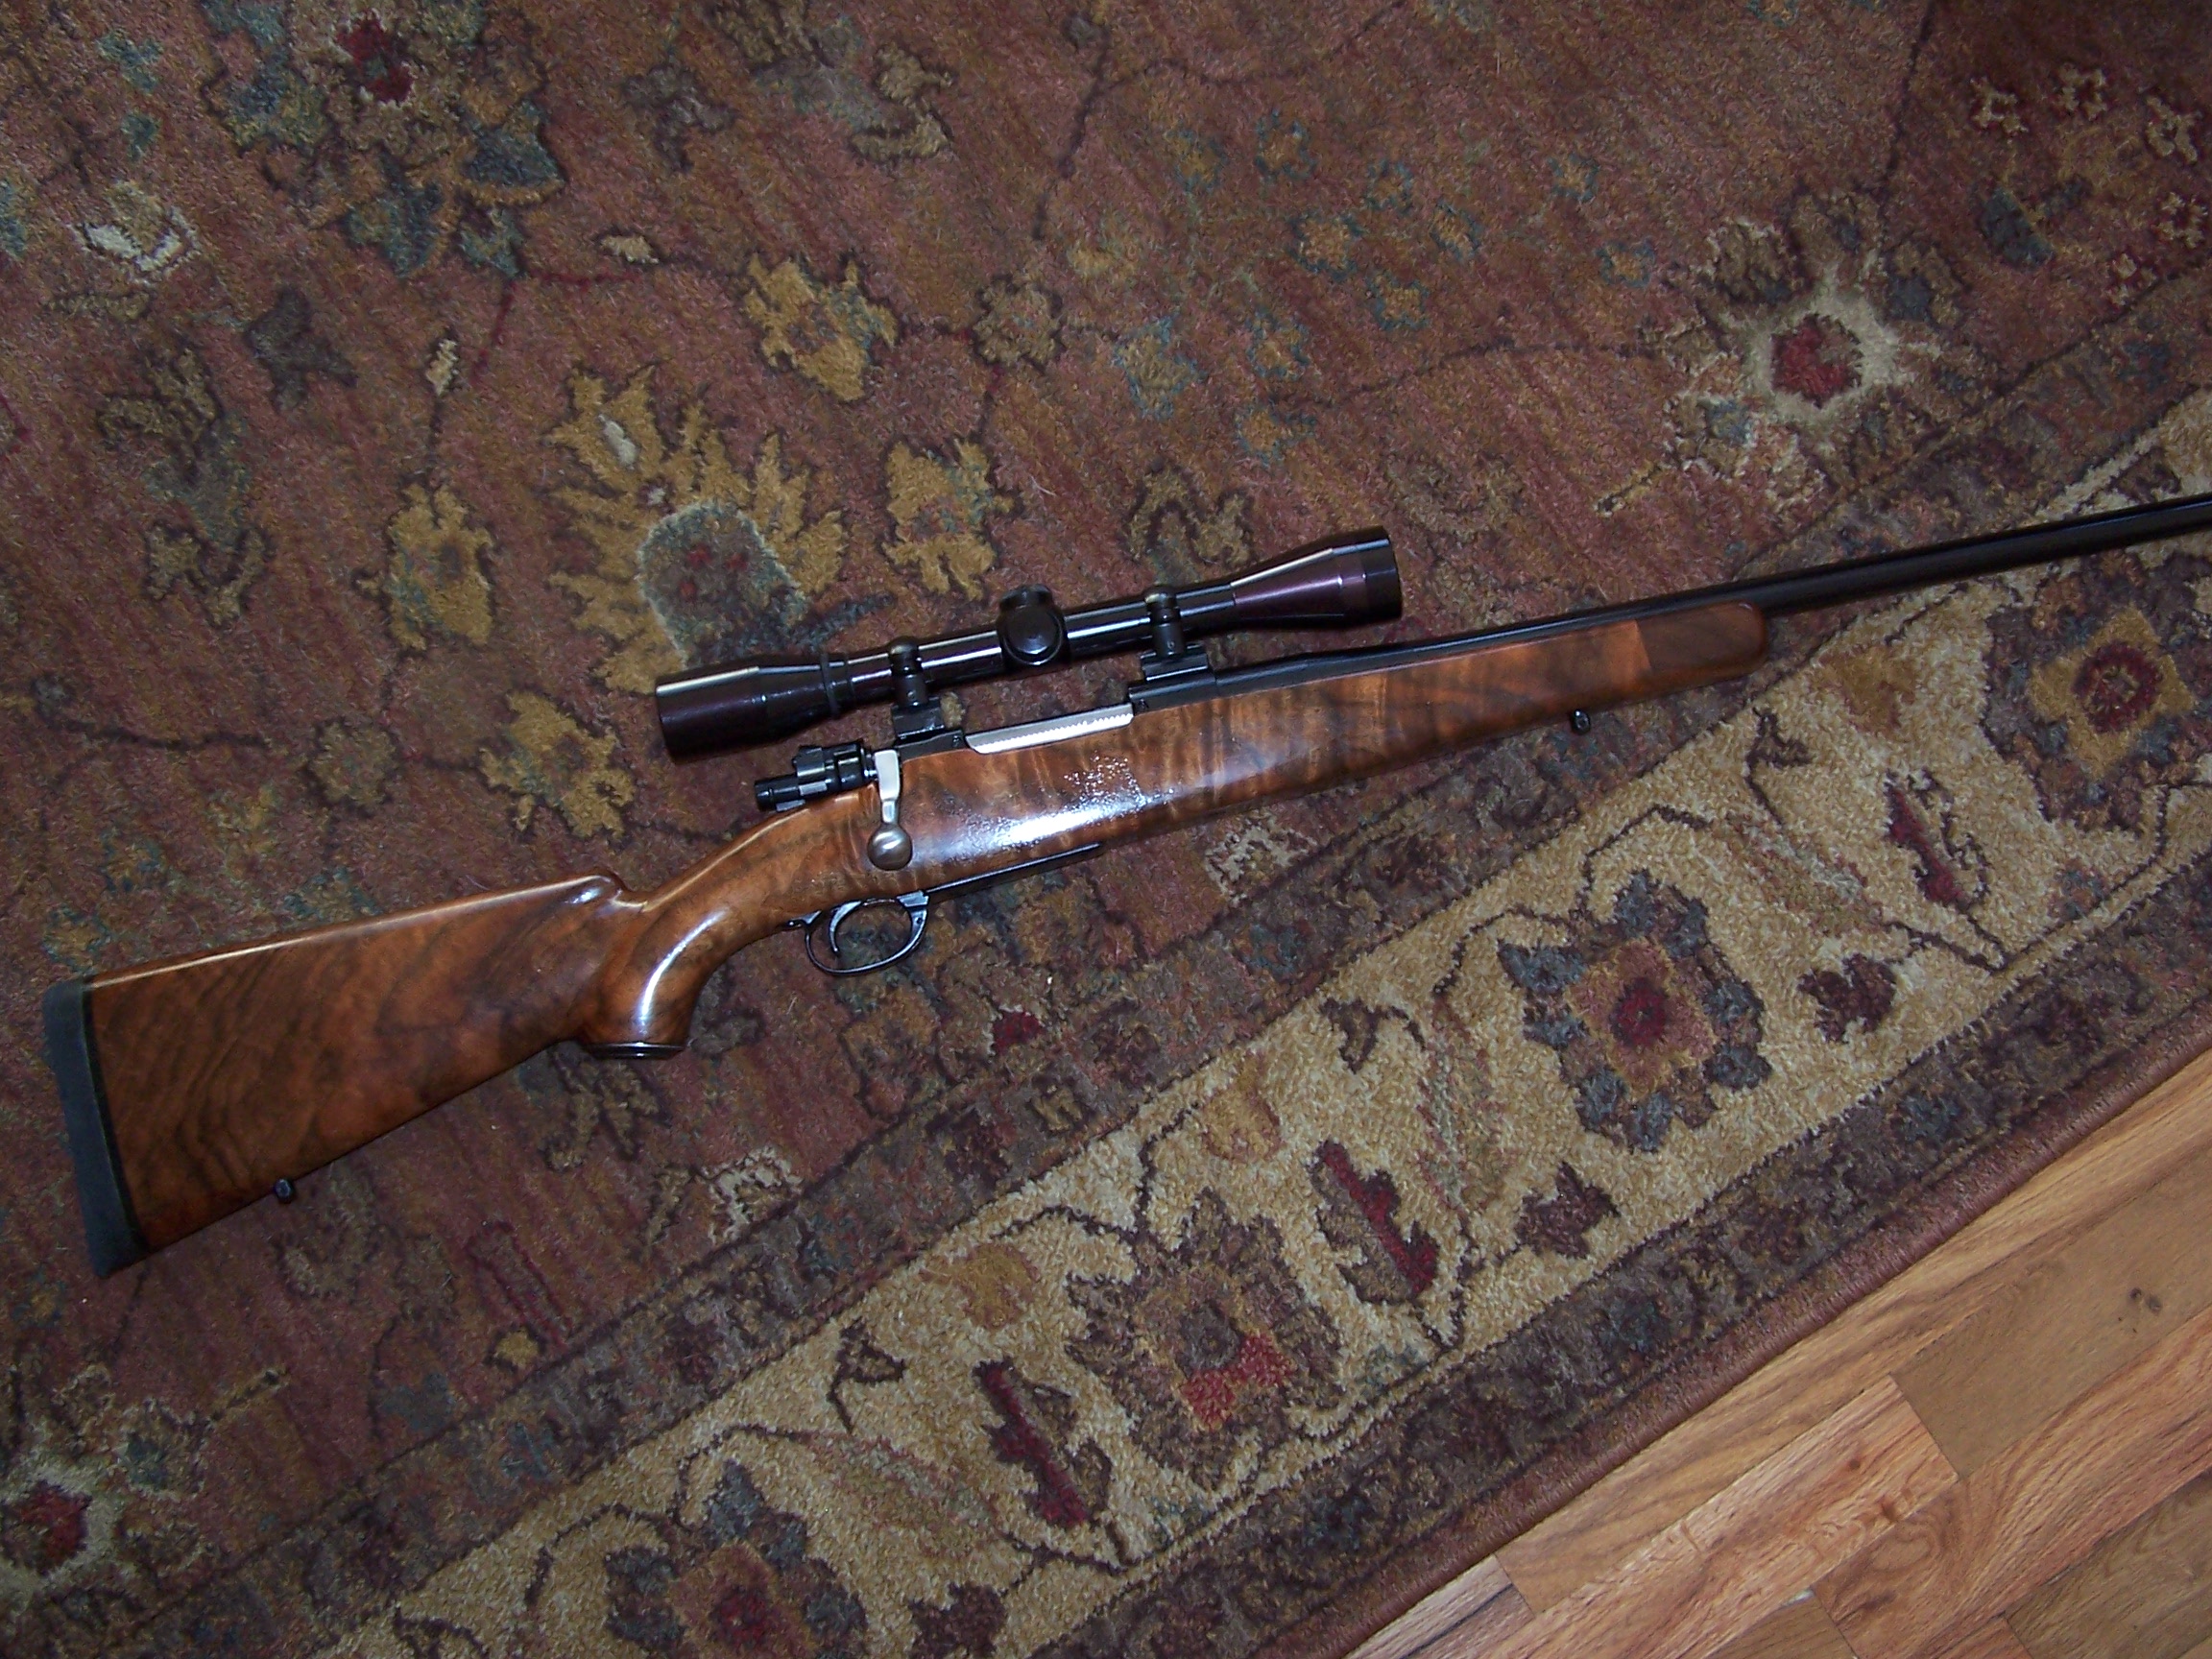
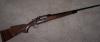
Brad's rifle referred to above is attached. Nice looking simple lines and the tip and cap look like a nice touch. Overall elegant appearance.
-
I received the Madagascar Ebony today. It looks nice and quite useable. I like the contrast. I will use it on this rifle, if not the next. I also will post your pictures in the next day, or so. They're on my pc at work. Nice lines on your reconfigured stock.
-
Thanks everybody - ignore the cannelure and load to recommended length.
-
Gig'em '80
-
I'm fairly new to handloading and have a simple question about the above referenced bullets, powder and OAL of a 308 Win handload. I reference Lee's Reloading Manual and note the max OAL as 2.81 and for the powder above a min AOL of 2.745. Fine, I can reload according to instructions, which I understand to be highly recommended. One problem. The min OAL does not seat the bullet to the cannelure. Should I seat to the cannelure and be below min AOL (lots of freebore), or seat to min AOL and ignore the cannelure?
-
Where did you get that stock? And if sold by one of the better known companies, what style is it? Those are really nice, simple lines. I especially like the walnut tip.
-
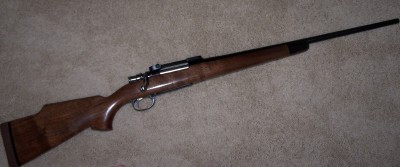
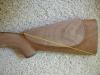
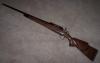
That's what so great about finding/restoring old sporters. I have several stocks that have blemishes that I would discard if the wood was ordinary, but can't seem to do it because of otherwise nice wood. Although this stock's wood is rather unremarkable, it's nicer than most "over the counter" stocks, I believe it has interesting potential through re-contouring - I want to "save" it. I don't know if you noticed but someone did a nice job of patching and blending what must have been some heavy scratches. In the first picture, which is the right side of the buttstock, closely note the inlay in the middle of the buttstock that starts in the flute and is bordered at the bottom by the "tail" of checkering. The patch extends halfway to the buttplate ending in a 90 deg. point right near the middle of the buttstock. There is another 1" patch in the heel with a "point" toward the comb - the dark angular "scratch" gives it away in the picture. Maybe I can improve on that somehow -fill it with its own dust composition. Fortunately, my plans don't involve modifying those areas. This is a keeper for sure. I'll like the completed project because it will be some good wood, mostly my re-work - and on the cheap. I'd like to see your pictures and would appreciate some dark walnut for a cap and tip. Let me know what seems reasonable to you.
-
Thanks, that helps a lot. That eliminates the 7.7 Arisaka. A 308 Win go-no go gauge will be available in the next few days and I'll try it.