Bob58
-
Posts
188 -
Joined
-
Last visited
Content Type
Profiles
Forums
Events
Everything posted by Bob58
-
I'm thinking it is 308 Win. but still don't know the origin. Bore diameter at crown measured with my dial caliper is the exact same ID as a spent 308Win neck - I measured both. My dial calipers said .307 (?). A .308 bullet rests upside down in the crown .192" from cannelure. I measured the distance from the chamber opening (front edge of extractor groove) to the base of the neck at the shoulder to be 1.602". If it were 7.7 Arisaka I think that measurement would approach 1.874" and bore diameter would be .311". I also chambered a spent 308Win case and it chambered to the extractor groove. If there is anyone out there who has a 308Win cartridge or spent case and a 7.7 Arisaka rifle, I'm wondering if a 308 Win would chamber? I believe the 308Win's wider body would prevent it from fully chambering in 7.7 Arisaka - its taper is more severe than the 30-06 in which a 308Win will not chamber. That would be very helpful and give me additonal confidence that it is 308 Win.
-
Very nice. You should be proud. Very nice bolt handle work - looks just like my favorite, the FN-style.
-
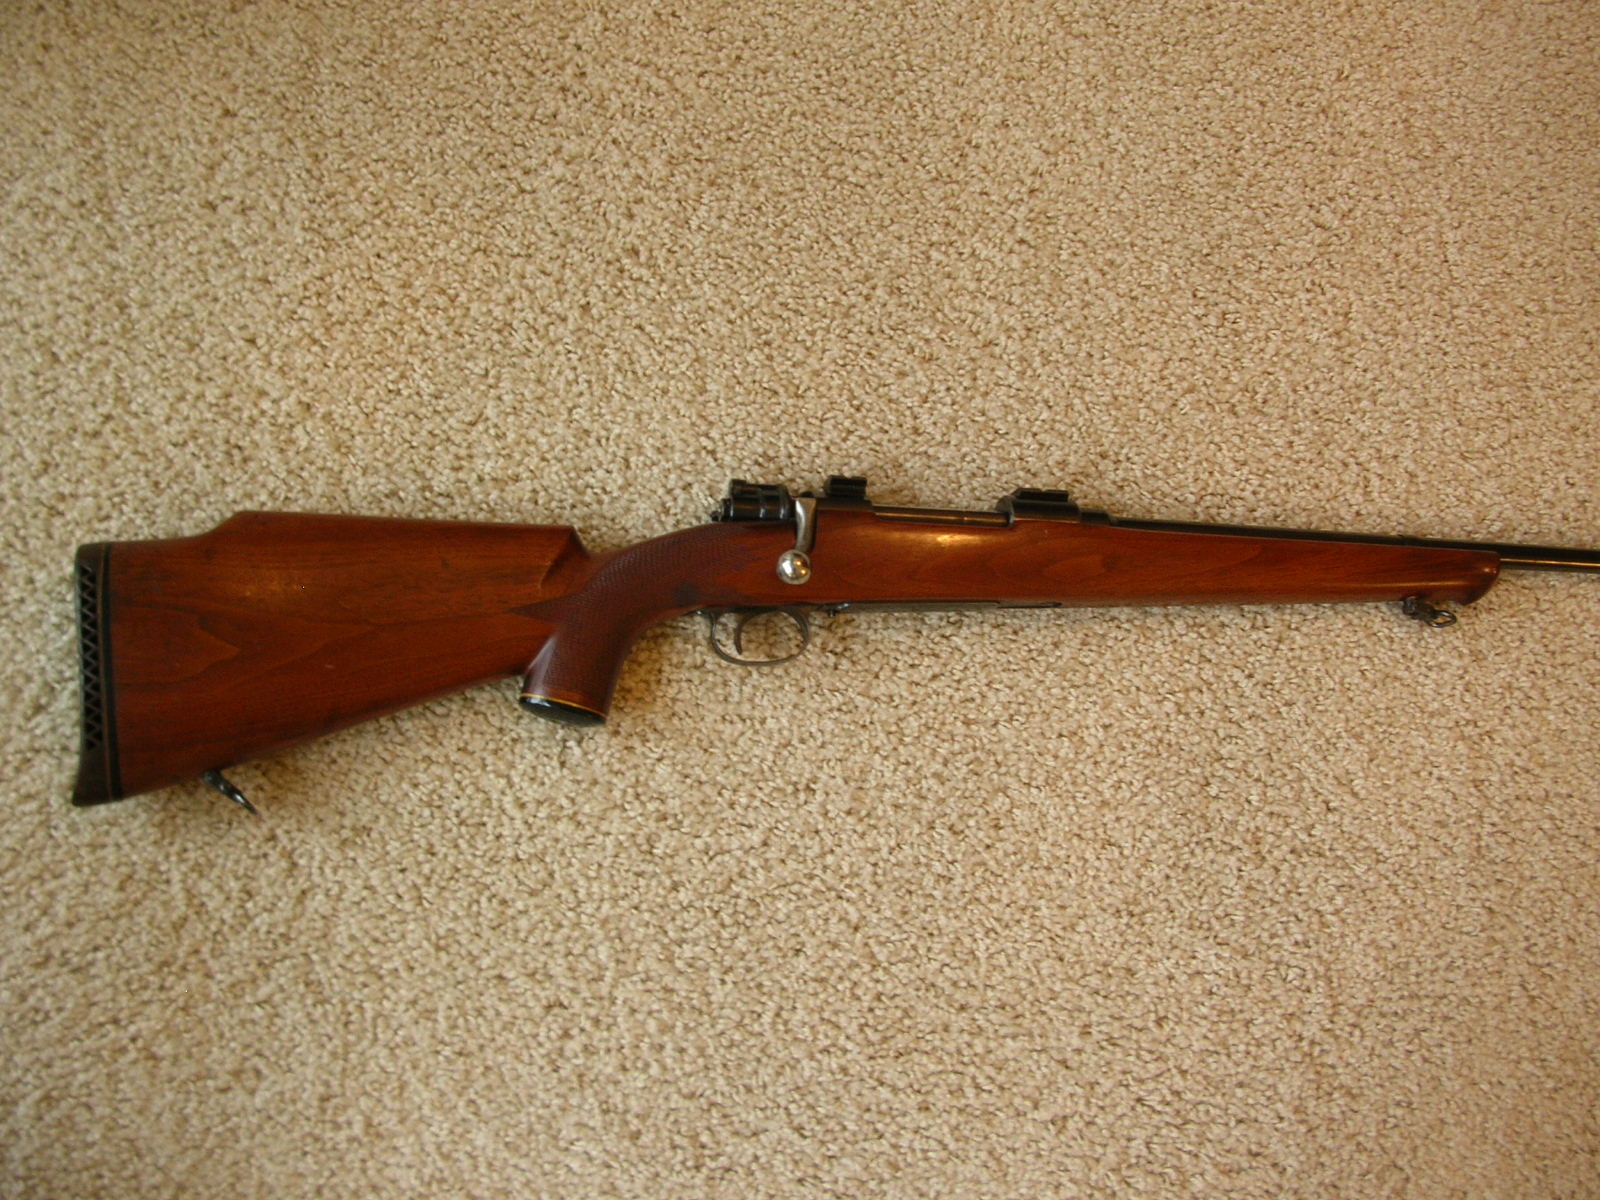
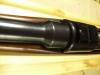
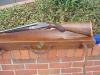
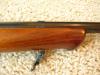
Can someone help me with some characteristics / dimensions that might help me identify (w/o chamber casting) whether the attached picture is possibly a 7.7 Arisaka barrel? From earlier posts elsewhere on this forum I suspect, with tinkerfive's help, that it could possibly be a Japanese barrel. I've been able to determine the following: Dimensions @ shank - 1.075" wide and .75" long in "bulbous" area, A .308 bullet hangs in crown (upside down, it hangs prior to the cannelure) A spent 308Win case can be chambered, 4 grooves / 4 lands with grooves approximate 3x land width Attached to a FN commercial mauser action (is it a Japanese barrel that has been cut and shank and rethreaded?) Any ideas? What would you evaluate next? (Other than chamber cast which I'll likely do).
-
Hmm. 7.7 is dang close to to 7.62. I chambered a spent 308 Win. case and placed a .308 bullet in the crown to test the bore size. That's how I "concluded(?)" it was 308Win- I could be wrong because that contour seems similar. I need to research and see what dimensions that Japanese round is.
-
I've never seen a rifle I didn't like - each has its own attributes. Yours Ken could double as a paddle. It's not nearly as ugly as that rusted rifle you found on the sandbar.
-
Yep, lookin' rather heavy at one end. Also some pretty strong pitch. Does it wobble when it rolls?
-
I really like that! I need to find that book. I have a non-d/t Husqvarna 640 that would look great re-stocked like that. I can't see the detail referred to in the text but it sounds pretty special. Thanks for sharing that. Dang, too many good ideas going through my mind. Did you notice that forearm is pretty short? Coincidentally, I have one of those stock carving vises mentioned in an earlier thread to pick up at Woodcraft today.
-
Brad, Great minds think alike. I was looking at the stock again late last night and I considered for the first time modifying the forend as you suggested. The existing schnabel is pretty well excuted so I did'nt rush to get rid of it like elements of the buttstock. I have no problem with schnabels -they just seem more appropriiate with a drop-comb, iron-sighted rifle. The barrel is 22" and the forearm is currently 11 3/4"- a little bit longer than the customary "half of barrel" so there is room to work with. Two ideas come to mind: 1. Cut off the schnabel and tastefully round off - easy to execute and forearm length would be perfect. But that may be too easy. 2. I could lop off the forearm just behind the swivel and add a tip while reducing length 3/4" When all the dust settles the forearm would be half-of-barrel, tip length should be proportional and barrel band gone. I'll have to put a sharp pencil to the dimensions. Regardless of which option is chosen, the forearm would be a little thinner than most modern forearms, but still attractive. A secondary benefit would be an overall "modernization" to a more scope-appropriate style. Before I do any forearm mods though, I'll work on the buttstock's balance and lines. That will give me more time to think about the forearm and let ideas settle in. Visualize twice... cut once. Also, losing the checkering is not an issue. Although I am only a moderately-skilled amateur, I feel my checkering could be a slight improvement - and be mine, which is all part of the fun. Thanks for the ebony offer, but I have some stock myself. I'm partial to a darker walnut and medium contrast similar to some of the Kimber rifles. Do you have any very dark walnut?
-
4 grooves/lands with grooves about 3x width of lands. Any idea about country of origin? I'll need to try it out and see how it shoots. It's bright/sharp and looks new.
-
I would need to fill the grip cap screw hole. Something akin to this?


-
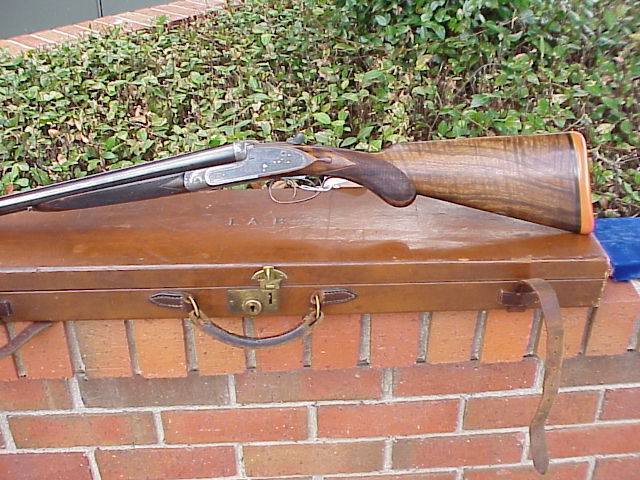
It is attached to a FN commercial mauser action marked 1951.

-
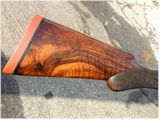
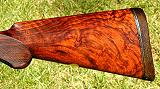
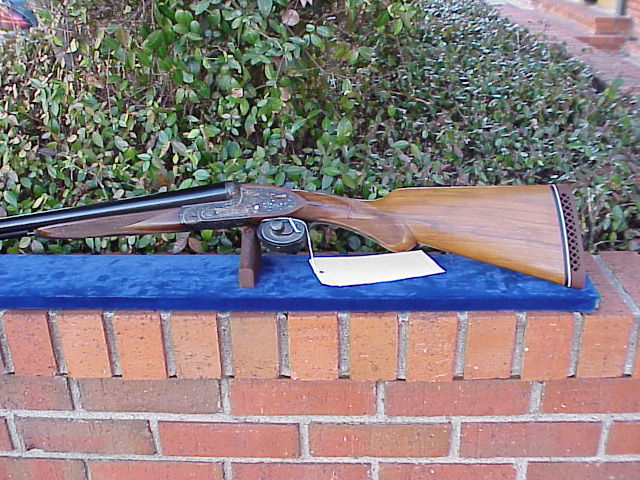
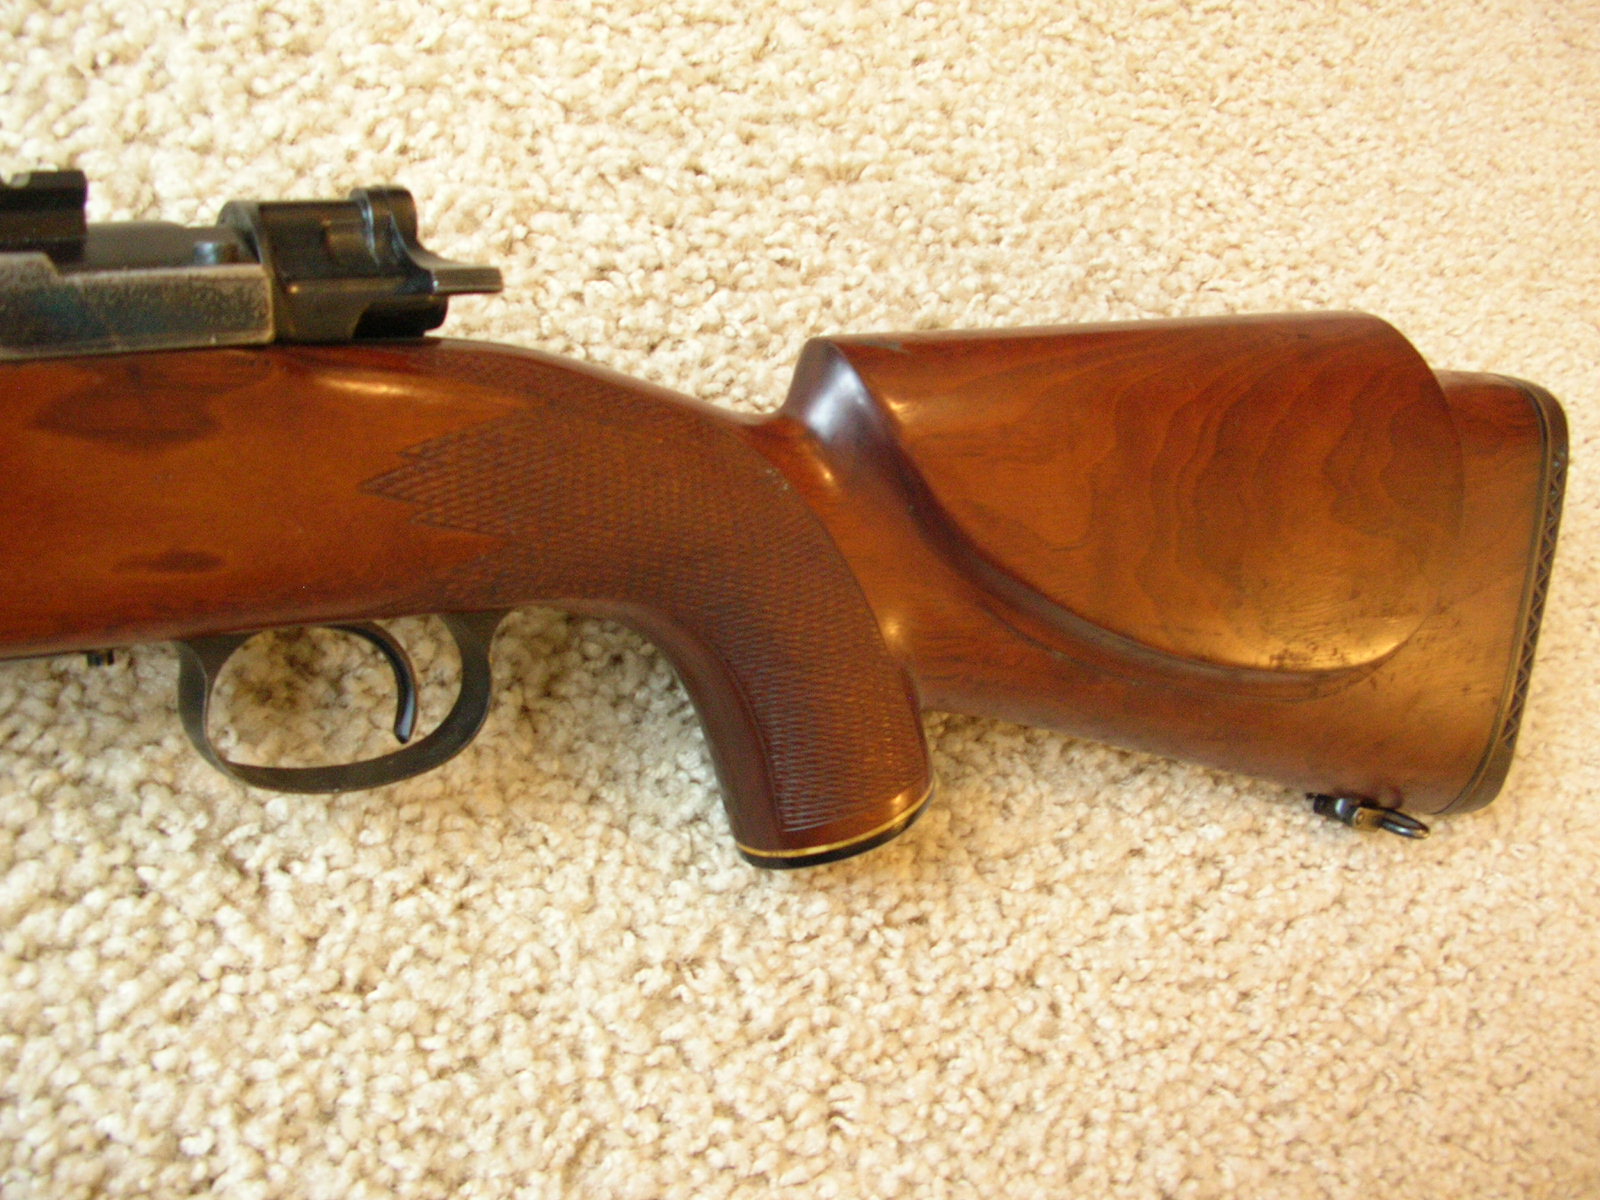
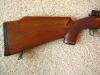
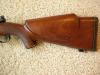
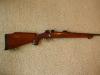
I picked up a new-to-me, FN-based, 50's era (?), medium quality, custom rifle in 308Win today. See the attached pictures. It will be my budget project this spring and I would like everyone's opinions on some general plans I have to improve this stock. I'm no expert and want to attract their comments. The metal is in near perfect condition except for ejector box, but the stock needs some serious help - it lacks simple flowing lines that complement the Schnabel forearm (which I'm stuck with - can't add forearm). I'll largely be preserving the master lines - just tweeking weight and softening some harsh angles. My initial observations are: the buttstock is too heavy, the grip is too closed and the recoil pad is dry and brittle. My proposed remedies include: Observation 1: Butt stock appears too heavy and not balanced with lighter Schnabel forearm. These should remove weight and lessen bulky appearance. Slightly drop top of cheek piece, but preserve slight angle rising from comb toward heel (bolt rubs comb when removed), Thin cheek piece and contour to butt stock, and Taper cheek surface forward until front of cheek piece disappears into grip. Observation 2: The grip is too closed for my taste. These mods should promote a more open appearance. Grip is too long at 4.5 inches from trigger ! Shorten by about 1 inch to point where it meets buttstock and install thin walnut grip cap. (Carefully choose cap angle to promote more open appearance), Grip at cap is 1.875"long by 1.5" wide. Entire grip can be thinned, Rechecker with pattern that promotes a more open grip appearance, Modify flutes in comb to point toward toe not the back of grip cap. (not sure on this one). Observation 3: The recoil pad is dried, cracked and ventilated. Replace recoil pad with ½ inch , solid black pad (red maybe?), Soften pitch which is currently 4.75 inches at 22” !!! (By changing the angle of the recoil pad the grip might appear more open when you step back and look? Maybe not.), LOP is 13.5 inches so no weight removal or bulkiness opportunity there. A couple of additional questions.: Does a combination of Schnabel tip and no front sight seem mismatched to you - didn't Schnabels go out of style before scopes became common? Anachronistic? Should I add a front sight just for appearance? How much will that barrel-mounted swivel impact accuracy - or should I really care. All I want is hunting accuracy. Please comment and we'll have some collective fun and see how this all works out. I'll re-post when modified and refinished.

-
Re 175 gr. jacketed on page 362. The five highest velocity loads (ranging from 2,400 to 2,500 f/s) and their pressure in Lee's Modern Reloading 2nd Edition: VEC TU5000 48,200 CIP A-XMR-4350 45,000 CUP A-XMR-3100 38,400 CUP ACCUR 2700 44,500 CUP WIN 760 44,500 CUP
-
Maybe you should spread Cayenne pepper or some other foul solution throughout your rock bed.
-
We have a dachschund that I'm convinced would eat himself to death if we provided the opened bag of dog food. He eats just about anything on the floor - the only thing he won't seem to eat is citrus peel. It's like a treasure hunt everytime he curves his back - balloons, ribbon, doorstop tips, hershey's kiss wrappers (presumablly full at one point), and other non-recognizable crap (no pun intended).
-
I want to see pictures with some scale!
-
Well like most projects, especially the smaller challenges we don't always wait on good advice, but last night while waiting on supper I incorporated many of these ideas. I dumped all the bullets in a glass measuring cup and "tumbled them" by hand in the cup to agitate and separate the foam from the bullets. Of course the granules became finer and sank to the bottom and the action served to remove a lot of the "adhesed" foam. I then scraped the bullets off the top leaving the "foam powder" and then cleaned the measuring cup. Placed the bullets back in the measuring cup and added penetrating oil . Tumbled by hand again for about 5-7 minutes. They didn't tumble as well and tended to cling to each other. The penetrating oil chemically removed the adhesed substance leaving a stain. Dumped the bullets on a rag and wiped and inspected each bullet individually - 227 were unblemished on surface and w/o stain; 73 were partially stained. As I closely inspected the stains I expected a compromised surface, but my fingers could not feel a difference. I'll fire those through my "throw down" 22-250. Not bad for $12. Simple project, simple process, but felt I'd share and write about it. What's time to a hog?
-
I need some ideas about how to recover 300 .224 Speer bullets that were stored, perhaps in heat over an extended period of time, while resting on foam in their original boxes. (run on sentence?) It appears the foam dried, degraded and was then agitated to very fine granules. Most bullets have required only some handwiping and some compressed air in the HP. However, some appear to have foam granules/residue adhesed to their copper jackets perhaps where oil flowed, pooled, rested and dried over time. My initial thoughts are that since foam is formed from petroleum distillate (?) it can probably be dissolved with a lighter petroleum distillate. Initial thoughts include WD-40, penetrating oil, lightweight household oil, lanolin, GOOP, acetone, etc. I obviously want to avoid any abrasive; any chemical that would etch or stain the copper, and anything that would leave an unfriendly residue - preferably something that would evaporate. I purchased the 300, or more for $12 and have already recovered almost 200 simply with hot water so I'm more than whole, but these days I'm not ready to give up on the rest. (Can you get too much of a good thing?) Any ideas as to cleanser or next process? I have a number of ideas but would like to give y'all a reason for existence. Note: I don't have a tumbler.
-
I agree with LL - keystock epoxied in, secured with small holes drilled at angles in both keystock and stock to provide grip. Make sure the recoil lug is flush against the key stock if you have it abut the recoil lug. I'd probably consider the keystock as a "reinforcing filler" and have epoxy or glas abut the recoil lug since it "flows".
-
I've sent "early birthday shopping" e-mails to my friends and family.
-
Congratulations, you'll have to give me a tour when you set up shop. Get Clemson up here and we'll have a lemonade or two together.
-
Wednesday Morning Weinie Roast In The Old Home Town
Bob58 replied to roscoedoh's topic in Chewing the Cud
I know that area - boyhood home of "Gentleman Jim" Reeves. -
That is what sporterizing is all about - swords into plowshares. ( It's just an expression... bears little resemblence to a farm implement.) I like the simple modifications.
-
What is a reasonable price for a complete square-bottom, small ring bolt?
-
I'm interested in others' experiences and preferences (and why?) regarding checkering finished vs. unfinished wood. I've tried both and prefer checkering the unfinished stock. Not sure whyit happens, but I just seem to get better results. It might have to do with hardness. But I can't say I even notice a difference in cutting ease. However, I do take the finish down to the wood. Unfortunately after finishing with several coats of oil the checkering may need to be recut prior to the last coat since the checkering may partially fill. However, that's not real difficult or time consuming. Checkering prior to finishing is pretty much required for stocks which you plan to stain (but is that really a stock worth checkering?)