-
Posts
43 -
Joined
-
Last visited
Content Type
Profiles
Forums
Events
Posts posted by mr fixit
-
-
Lapping the lugs will affect the need for HT much more than will removing a crest.
I just about finished up a 24/47 in 6.5x55 tonight. After truing and lightlylapping the lugs it is good to go.
HT will not affect rust bluing except that any blue on the receiver at the time it is HT'd will be gone when you get it back. HT does not cause it to be more difficult to blue. You're likely to run into more problems from the welding rod that HT.
Ok, thanks! Lets define "Lightly lapping" the lugs. Going from 50% to 90% contact?
What would too much lapping be? Just trying to get a feel for when it needs to be treated.
Scott
-
First, I've decided on the next project. I have been waffling back and forth over which receiver to use, between the Yugo 24/47 I currently have, and a Swede which I do not have. I'm going to use the Yugo and make it the best I can.
My questions, based on that plan are about cleaning the receiver. I am confused by various threads in the archives and forum in general. So I ask plainly what is the "best" plan.
The action is "pure", never sporterized. I will remove the charger hump, drill and tap, lap the bolt lugs, weld on a new butter knife bolt handle, re-barrel to 6.5x55, new safety and floor plate release. All of this will be put into a full stock "Mannlicher" style.
When I clean the outer receiver, I may or may not remove the crest. I may or may not remove the side rail markings. Will I need to have the receiver re-heat treated? Will removing the crest/side rail markings or leaving it affect that need?
What would cause a receiver to need re heat treating? How does the re treating affect rust bluing?
Scott
-
I'm looking for specs on the receiver diameters of both Mausers and how they compare to a Remington 700. Thinking about changing a project plan.
I don't have any to look at other than a LR Mauser. Side by side photos would be great if anyone has them. If not, jut the Dia. specs would help.
Thanks
Scott
-
Maple spacers? The idea is to make it look GOOD.

Better to splice a sjort extension on where the normal fore end ends than to add a long extension. Add a wafer of ebony at the joint to draw attention to it and add color. Right idea Brenden, wrong color though.
Z1r, a slice of Ebony was what I was thinking, to match the tip of ebony, and the grip cap.
however, I do like the idea that Richards has the full stock!
With that in mind, the only thing I am slightly worried about is the action. What is the consensus of folks here on giving a 96 action (cock on close) for a first rifle. Is there any reason not to?
Looks like I'm going to have to learn to checker wood.
Also, anybody bought any of the 96 barreled actions from SARCO? Any idea on condition?
Mr Fixit
-
I have had an idea in mind for a while; a Swede 96 in a trim full length Manlicher stock.
The problem is I can't find a full length stock, that I can afford that is. Boyds and Richards neither list any Manlicher styles.
So, Tell me about this idea. A 2 piece stock, butt stock to just forward of the receiver, and another piece from there to the end of the barrel. That's the idea, now how to make it work?
How would you attach and stabilize the 2 parts together?
Mr Fixit
-
I have a friend looking to restock a Swede. He wants a full Mannlicher style stock, doesn't have to be extra fancy wood, but nice wood would be a plus.
So far, he has found some in the $300 and up range. He's looking for$100-$150. Can he find that? If so where?
Thanks
Mr Fixit
-
I bought some poly resin and dyes at a hobby shop. The dye 'looked' just like the dye in the accuraglass kit. They had all colors at the shop. I think Hobby Lobby it was.
-
Will it work as good for what?
That's the big question. What will you use it for?
-
The finish is similar to Duracoat, although I've never used that. It comes in a bottle, and is applied with a air brush, or spray gun., then baked in the oven for 1 hour to cure. It has both Teflon and Molybdenum dissolved in it that coats the metal.
The bolt handle was from Brownells. It's a "Ruger" style, at least that's what I call it. It was a cast part, and I had to do a bit of sanding to get it to look good and get the mold marks off. Then after I had it smooth and nice I sand blasted it with fine media to give the finish something to hold to.
As far as kids,
 I'm full up. This rifle is for my 12 year old. Of course my 9 year old son is already asking when he gets his.
Guess I'll just have to keep building.
Mr Fixit
-
This was my first rifle to "build" as opposed to assemble like an AR or FAL. This was meant for my son from the start, to be his first rifle. It is a Yugo 24/47 with a Brownells short chambered barrel in 6.5x55 Swede. Laminate stock from Richards Microfit Stocks, Ebony fore end tip, custom grip cap, Swede bottom metal with '1909 Argentine' style floor plate and release from Tennessee Gun Parts, "Ruger" style bolt handle, Bold trigger, Leupold 2-piece scope base and rings, Nikon Buckmasters 3-9x40 scope. It's finished in Norells Moly Resin in flat black on the barrel, action, and bottom metal, and flat grey on the bolt, and scope base and rings. The small parts of the bolt, shroud, extractor, and ejector are in alternating black and grey.
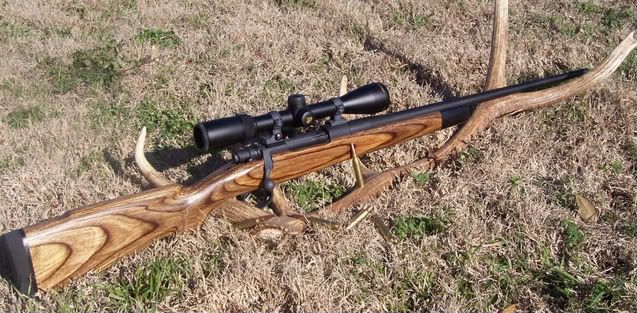

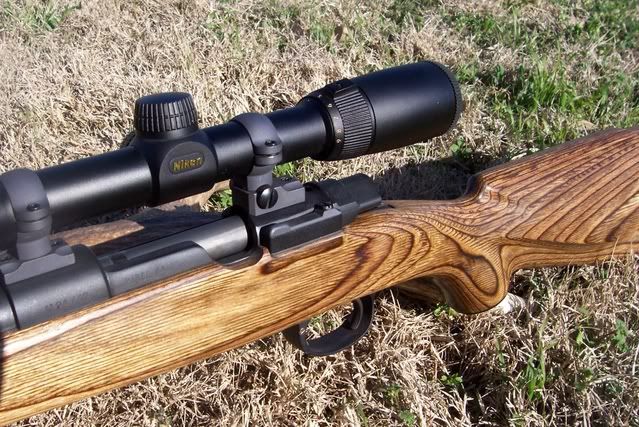

I'd like to know what you folks think of it.
Mr Fixit
-
It looks very good!
I do have a ?
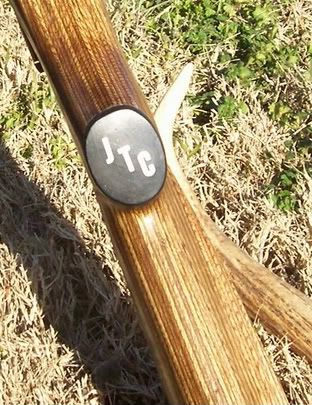
It appears that the gold finish was removed from the "JTC" and we are now looking at the zinc
underneath. To prevent tarnish of the zinc will you A. coat the grip cap separately with it's own coat of
clear epoxy ( or something else ) or B. will you coat the grip cap with the same polyurethane, tongue oil, etc
that you finish the rest of the stock with?
BTW. I have used epoxy to make several gunstock repairs and have just coated it just the same as the wood.
Tinker
The photo makes it look gold, but it must be a trick of light, they were actually silver to start with. One thing I did was take some letters that I wouldn't need and sand on them to see what was underneath before I started. I found that the letters had a silver finish over silver metal. The origianl finish was a rough texture, and sanding made it smooth. I think it looks better the way it is.

As far as finish, I used True Oil on the stock, and just coated the grip the same for 2 coats. It seems to cover fine. I had considered useing a thin superglue to cover it, that's what I use on some pens I make. So far, True Oil looks good to go.
Mr Fixit
-
I asked a while back, on the other forum I think, about using Accuraglass or something similar to "pour" a grip cap. No one had seemed to have done it, but I pressed on.
On my Yugo Mauser project for my son, I wanted to make a personalized grip cap with his initials. So, I did.
First, instead of using Accuraglass, I bought some clear polyester casting resin from a hobby shop (Michals I think). It is a two part resin which only takes a few drops of hardener, and can use many color dyes. I bought some black dye, and it looks very much like the dye in the accuraglass pack.
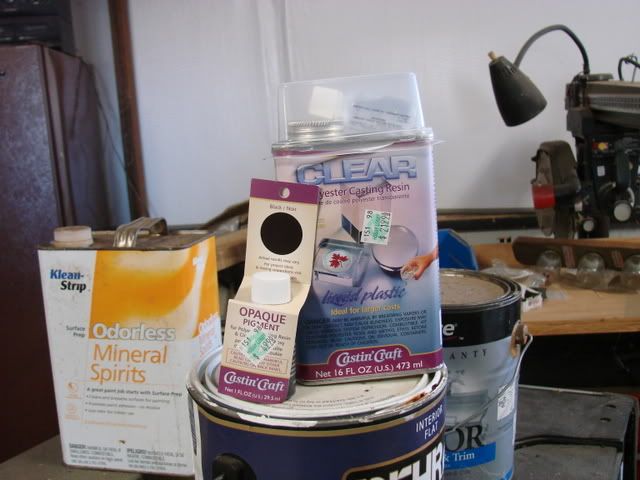
After I had shaped the grip area close to how I wanted it, I cut off the excess length flat, and angled the way I wanted. Then I put it in a vise and used a level to get the grip cap area perfectly flat. Then using some modeling clay, I made a dam around the area to hold the liquid polyester.
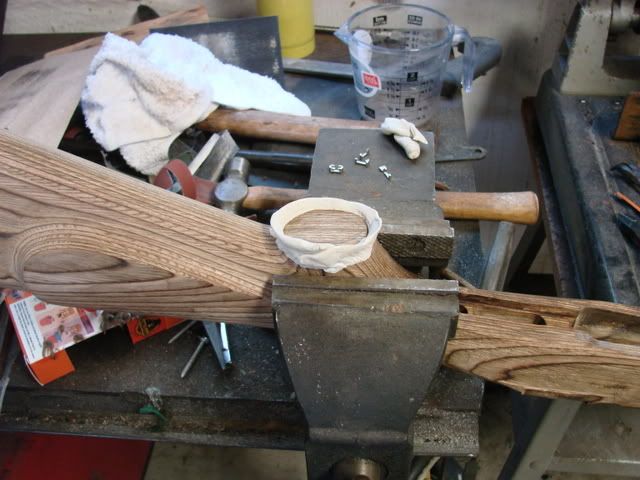
I marked the area for the initials, and then I used a dremel and a cutting burr to make some undercuts in the wood for a mechanical lock on the cap.
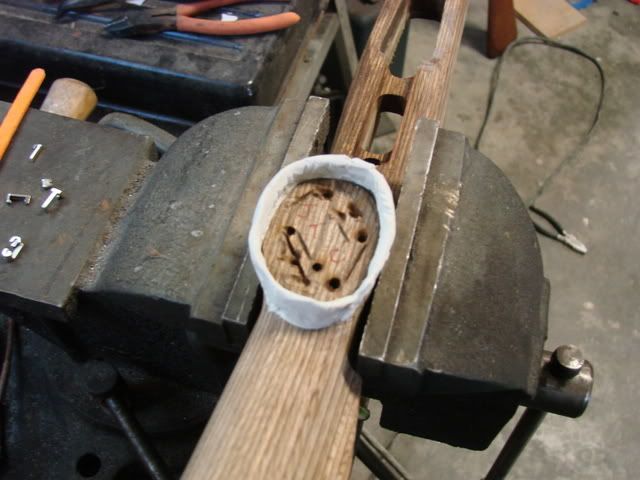
Next, I placed the initials on the grip in position.
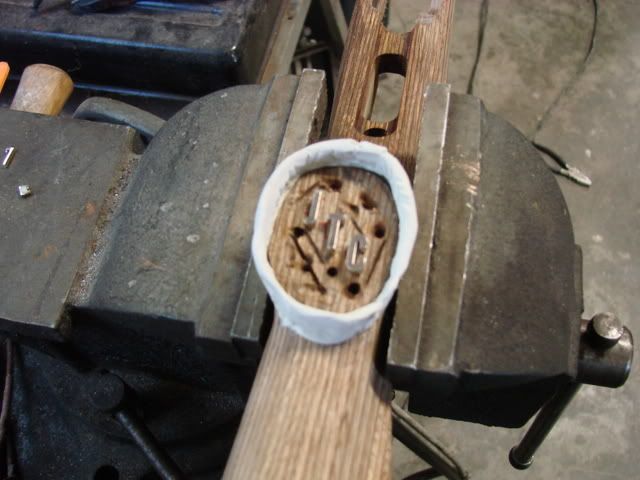
The initials were also bought from the hobby shop. They are some type of metal, likely a zinc type pot metal. They are made to be used on a leather type thong for a necklace and are about 1/8" thick or so. The have a slot in the back to slip the thong through which made them perfect for a mechanical lock in the grip cap.
The resin was mixed and colored per instructions in an old measuring cup and then poured into the dam over the initials. I poured it to just over the level of the initials so it could be sanded down flush at the same time. (pay no attention to the black cap next to the measuring cup, it was for testing)
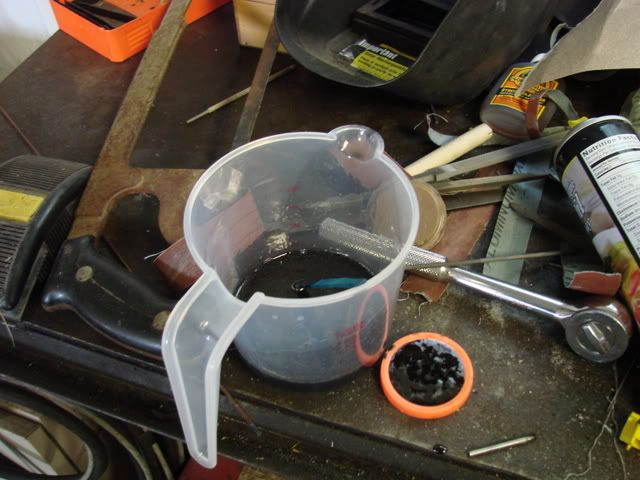
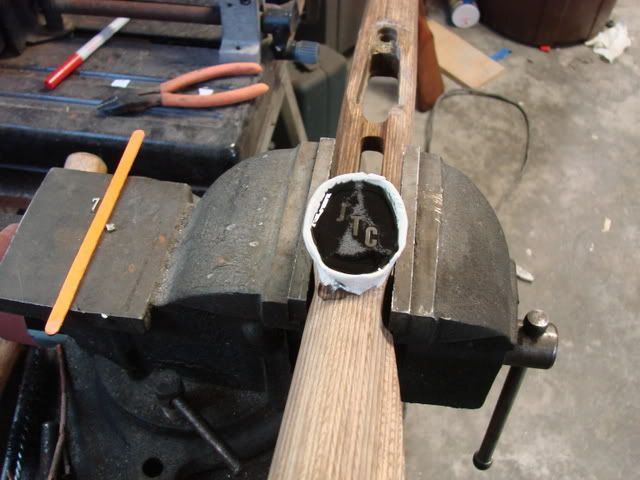
The only issue I ran into was that it took forever to 'dry' or cure. It was in my shop which is not heated or cooled. After 2 days it was solid, but tacky to touch. I re-read the instructions and noticed it said cure time varied with humidity. I took it in the house and it was solid and tack free overnight.
After curing, I removed the dam which showed the over sized rough side. I used a file to rough finish it close to size of the grip, then progressively finer sand paper to keep the grip size and angle right. The top I used a block sander to sand the entire surface at once. Just a bit of sanding uncovered the initials and brought the surface smooth.
And finally, a finished photo.

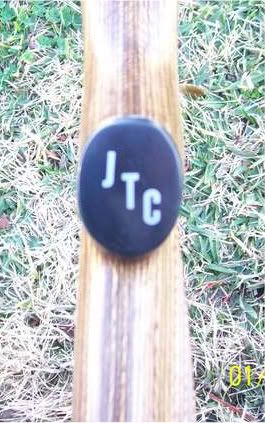
What do you folks think?
Mr Fixit
-
Sounds like you are using European brass, the rim is slightly larger and slightly thicker than American brass. Normally this wouldn't be a problem but it sounds like you have a bolt and extractor claw that are on the small end of the acceptable tolerances.
Before you do anything else, take the bolt from the action and slip a 30-06/308 brass under claw on the bolt face and compare how it fits compared to the 6.5x55. If you notice a difference you might need to shave a little off of the ring of the bolt face or a little off of the inside of the claw, depending on where the brass is binding, if it is binding at all. Or you could just use American brass.
If the brass isn't binding, then your feeding problem is with the rails and feedramp. This is usually the culprit.
Hope this helps.
Jimro
Sorry, I should have said I am using Remington ammo. And a .308 brass fits about the same as the 6.5 under the claw.
Not sure if it makes a difference, but I bought these as barreled actions. They were in really good shape, with matching numbers. The bolt shows just a bit of pitting around the primer area of the bolt face, but otherwise the action looked practically new. Just wondering if these had been re-arsenaled and never made to work before they were sold.
Anyway, it looks to me like the brass is binding on the claw. Just wondering how much I can take off, or exactly how it should fit.
-
Well, I put on a new barrel in 6.5x55, cut the chamber and headspaced. Then the feeding problems raised their head. A cartridge would stop or "Hang" about 3/4 of the way in. I"ve worked on it, and I hope you folks are going to tell me I did the right things.
First, I polished the bolt face a bit, made it pretty smooth. Still had problems.
I took a cartridge and with the bolt in my hand (out of the rifle) just tried to slip the rim under the extractor and onto the bolt face. It was pretty tight, especially at first. I had to really force it to start under the extractor. So I carefully filed the bottom "hook" of the extractor. I just gave it a bit of a chamfer relative to the direction the cartridge would slide up. It is better, but still takes just a bit of force to get it under the extractor.
Next, I noticed when I put it back in and tried again (bolt and extractor only, no FP) that it still would hang. The brass had scuff marks badly that had to have come from the edge of the chamber. I remembered I did not break the edge when I barreled it. So, I pulled the barrel, and just chamfered the edge, Then took a cotton polishing bob and rouge and made it smooth as glass. Keep in mind, it's just a very small rounding of the edge.
Put it all back together, and it would feed all the way with just a bit of force to "snap" the cartridge in at the end. I decided I didn't want to do anything else, until I did some more research. As best I can tell, there are no more scuff marks from the chamber. It makes me think the issue is now the extractor.
How loose/tight should the extractor hold a cartridge?
So, have I done the right stuff so far? What else should I do?
Mr Fixit
-
Like it says. I have a .308 barrel and want to try to make it feed 308 well. Right now it hangs up 3/4 way in. So, am I right that i need to widen the fed rails at the front where they narrow together? How much?
-
Where do you live? Maybe a member with a lathe could requalify the barrel for you.
I'm east of the Dallas/Ftworth area Texas.
I am planning right now to call this a learning experience and get a new 6.5X55 barrel. Since I have to rechamber anyway, and this should/might fix the feeding problems I found with the .308.
-
Guys, I'm getting very close to finishing a Yugo 24/47 custom for my 12 yo son. Just a few minutes ago, I reamed the chamber. I'm using Clymer finish reamer and Clymer go and no-go gauges.
I got to where the bolt handle would close about half way, and put the reamer back in and turned it (by hand) 5 revolutions. When I checked the go gauge closed, and then so did the NO-go gauge.
I don't have a field gauge, but I did put a piece of masking tape on the no-go gauge. With that it would not close, only half way.
Tell me what I need to do (i'm afraid I already know).
I don't have a lathe, so if I have to set back the barrel I either have to make a new friend who has one, or farm it out.
Mr Fixit


Heat Treating And Removing Crest Questions
in Actions
Posted
ZR1, I sent an email. Wondering about how to get a receiver treated. Contact them directly, or make arrangements with you?
Mr Fixit