

scott63
-
Posts
103 -
Joined
-
Last visited
Content Type
Profiles
Forums
Events
Posts posted by scott63
-
-
Well I bought a nickel plating kit(electroless) to plate a receiver in a matte finish to match a stainless matte barrel. I knew it would not be an exact match, but I was looking for a nice subdued matte nickel, like the top of a 1970 series Colt 1911. I bead blasted the parts to be plated with fine glass beads and it did have a nice matte sheen to it.
The plating process went smoothly and came out with a nice uniform plating. However, it is so shiny, I'm sure that it would be the perfect thing for a pimp on T.J. Hooker or Starskey & Hutch. I'm thinking of trying to bead blast it and hold the blaster farther away than usual to try to not destroy the plating itself. Has anyone tried this? Thanks for any ideas......Scott
-
 I've got a jig. Here it is set up for my first attempt:
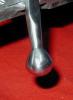
The bolt handle is from a military bolt, but obviously not the pure ball type. This kind is plenty servicable and attractive in my mind. My only complaint is that it ended up a little shorter than ideal. I may build up the end on the next go. Below you can see what it looks like after I cleaned it up a bit: (It's the second one from the left)

It was starting to look pretty nice, but I became suspicious of the quality of weld as there appeared cracks where I didn't get good penetration with the wirefeed. ("shooting goobers" as somebody here put it...) I horked on the handle and it snapped off in my hand. Time to reconsider...
The last nail in the coffin of the Oxy-Atetylene idea was a post here where an aluminum heat sink melted and clanged to the floor in the middle of a job. So, TIG it is. Like I said it just took me a while to realize that I could rent one.
As long as the picture is up, the one on the far left is forged, but my tastes have shifted and I think I will cut it off and re-weld. The handle on the top right is my mangled attempt to recontour a military ball, (Yours is MUCH better by the way!!!) second from the bottom is a Talley, and the bottom is an eBay trade. It appears cast with some roughness, but as long as there are no voids it should clean up well.
I also forked out for a two paneled checkered model that is georgeous. That's the one that has me nervous!
By the way, if I had a lathe I'd probably make my own from scratch rather than mess with a military ball!
After having some time away from the bolt I had tried filing, I did a little more work on it. I tried a different approach, I used a vertical belt sander and the smoothest belt I had so that it would only take off small amounts. Then I worked on small areas starting at the back and working around to the front.
I think that would work with yours too, you can see that on your bolt handle the angle on the top(of the pic) is shallower than on the bottom of the pic. I had the same thing on my bolt in the same spot. It probably seems like a crazy thought, but what about chucking that bolt handle in a drill press or electric hand drill in a vise and then using a file. As long as you don't press too hard it might work. Pressing too hard would probably not be good for the bearings.
I'm done with mine, it is not perfect by a long shot, but this rifle is definitely going to be a rough and tumble hunting rifle and not a show piece. Tomorrw I bead blast and hopefully this week try my hand at bluing. Good luck with yours, save that fancy handle for when you're confidant in your welding........................Scott
-
Very nice work Scott! What kind of welder did you use? Does the root of the handle have the cut-out that the shroud fits into? I'd love to see a photo of the back and hear how you dealt with that.
I've also considered recontouring the military gumball, and actually wasted a couple hours of my life that I'll never get back working with a half round file to get the shaft to flow into the ball in a graceful Talley-style pear shape. I ended up with an asymetrical mess. It's just too much hassle trying to keep everything round, contorting yourself as you file, and/or constantly repositioning the handle inthe vice to get a decent work angle.
It may be salvagable yet, but like you said, for $8.95 it's not worth my time. Still, the time is not entirely wasted. I learned something, and if anybody ever pipes up with this idea I can credibly advise them not to. Whether I'll be listened to or not is another issue!
Another technique I've considered but not tried is to use a torch or TIG welder to flow metal from the ball to the shaft. Basically start a weld puddle where the two meet and try to carefully work it around the circumference. It would still need cleaning up with a file, but would save labor. Anybody tried this?
I've got a collection of bolts and handles that I need to get after some weekend. After much gnashing of teeth considering purchasing an OxyAcetylene rig, and one failed attempt to weld a handle using my wire feed, I have decided to rent a TIG welder and crank out some work once the rest of my to-do list gets whittled down. Took me awhile to realize this option was even available. I don't know why I didn't think of it before.
I used a TIG welder and the Brownells 3.5 % nickel rod. Every photo I've seen of welds completed with the oxy-acet. always looked very crude in comparison to TIG welds. The friend that let me use his TIG outfit says it is because the TIG heat is very tightly concentrated, and is easier to get a nice clean bead. I'm not saying it can't be done well with the oxy, but it is beyond my abilities. Didn't try it with my wire feed cause I wasn't sure how the wire would blue.
The root does have the cut-out, I left the root just long enough, and carefully ground the bolt handle prior to welding to prevent it from interfering with the shroud. It does have a rounded "line" that the shroud butts up to, but it is slight and not visible when the shroud is in place. Even with the root at this length the handle will still just barely clear with low rings and easily clears with the medium rings. After himming and hawing about finish reaming it myself, I'm letting a friend/gunsmith do it because he has a lathe and I want it to be just right cause it is for my daughter. When I put together a .250 for myself, I'll do the finish reaming.
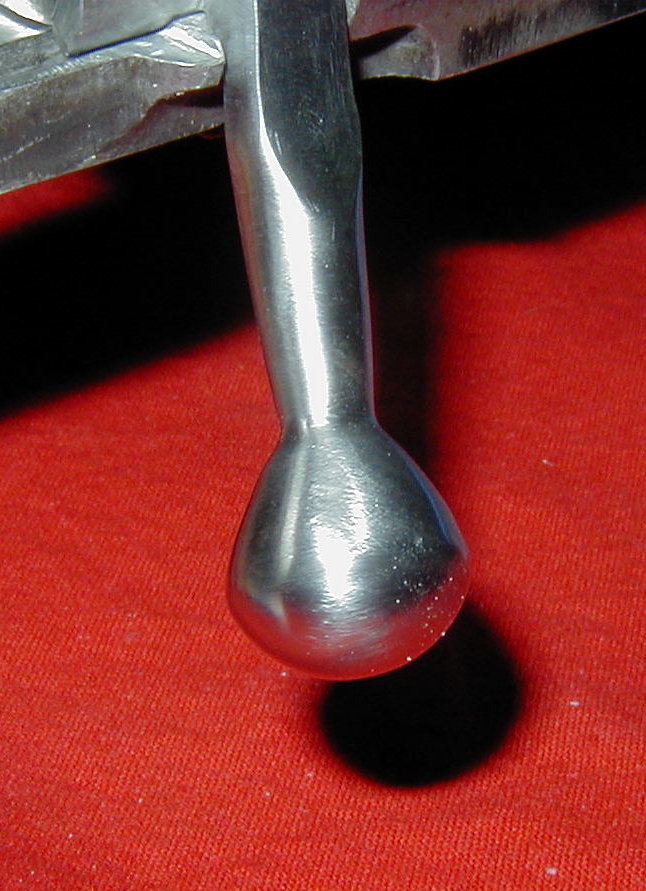
As for the bolt contouring, I agree with you, it is something everybody should try once. I think if you HAD to re-use a military ball the only way to go would be to cut it off and contour it in a lathe. I was able to get the area where the shaft/ball meet tapered pretty good with a 1/4 inch round file, but contouring the ball is the real headache. I haven't given up yet, but I had to leave it for a couple days to clear my head. I attached a pic of it to date, like I said it still has some work to go. Puddling the weld is a plausible idea, but you really have to look at the time/effort/result and decide if you're not better off lopping it off and starting anew. If this one pictured wasn't close enough to meeting my meager standards, I'd just cut it off.
You do have a bolt welding jig? It speeds things up considerably, and you can accurately mock up your bolt to measure for clearance..Happy welding..............Scott
-
Scott
I don't know for sure about Mike but i very carefully file mine flat and if i had to guess Mike is like me being a talented metalsmith i am pretty sure he files them too a good craftsman can file them perfect without even having to think about it it just comes natural. I for one know he has that ability too i can see it in all the work he does now some of the guys well i would not want anyone to see what carnage i done unless i was asking for help to clean it up. God knows were not all perfect and all of us mess up something but some of us are better than others. To do them right you need vision and i don't mean your eyes being perfect. I mean you need to be able to graps what it should look like when finished and be confident you can achieve that goal.
That can be tough the first time you do it but it gets better. I was nervous doing that last one since i had alot of issues to address that i never see with a normal handle. That is when talent takes over.
Rod
Rod, after my meager attemp at bolt welding/filing I would wholeheartedly agree there is a lot of natural ability required, but practice definitely helps. Seeing how the handle is placed in the welding jig would help me for the next one though........Scott
-
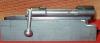
This is a swede I'm going to sporterize for my daughter in .250 savage. The bolt handle is done and the lugs are lapped. Next stop, barrel and headspace. This is the first handle I've welded and it was definitely a learning experience. I think the next bolt I do will come out quite a bit better.
I was also doing some work on a 98 bolt that someone else welded using the military ball. I thought I would try to contour it a bit, but only had files to work with. I learned two things during that little journey: 1. If I were to try to contour a bolt ball I would cut off the ball with a bit of the shaft, mount it in a lathe and do it that way. 2. Once I had the ball cut off for idea #1, I would throw it away and weld on one of the Brownells bolts. The headache isn't worth 8.95.......Scott
-
The method I have used for years with Mausers is simple and has worked well for me.
On the bottom of the receiver find the witness mark.
Install the barrel hand tight, and make a mark 1/8" on the barrel before the witness mark.
Now torque till the two line up.
This gives you about 50-60 Foot Pounds of torque.
I recently re-barreled 2 Swede Mausers with new Swedish Military barrels that were finish chambered. Both headspaced exactly on the Go gauge using this method.
The man I learned engraving from taught me this in 69-70, he learned this in Germany.
Rebel49
Thank you all for your opinions, rebel 49 I think I'll try your method with my project.
-
Ok, I've read what I can find on installing a short chambered barrel to finish ream, and I've watched a couple videos on the same topic, but all I ever see is "...don't over tighten..." or "...just snug it up..." Aren't there torque specs like when torquing end cap bearings or lug nuts? I've seen some Remington barrels removed that were never fired and new and they seemed a lot tighter than "...Just snug..."
What are your thoughts on this? .........................Thanks, Scott
-
Z1r, I really like the bolt handles you have previously posted and I'm wondering if you have any pics of them in the bolt holding jig prior to welding? After welding do you place them in a jig and use a mill to get the top of the root so flat? I'm working on one for a small ring now, and I'm pretty happy with it. I have also learned a lot, but mostly by making some mistakes. Thanks for any help....Scott
-
So I see that the mauser 24/47's are still available, although much more expensive than the K.Kale were. My question is are these VZ-24's that were modified in 1947 or something entirely different? Are these a "standard" large ring 98? Thanks guys.....Scott
-
something to look for on a lathe .you"ll need a least 36" between centers and 1 1/8" hole in chuck with a low speed of 50 to 70rpm..the tooling adds up fast..... when asking about the cost of a used lathe all ways check out what tools come with it ....boring bars,live dogs, faceplates..taper chucks....a good list of tools will cost
1/2 the price of the lathe
Thanks guys, this is exactly the info I was looking for.....Scott
-
I have decided to look for a used lathe as I should be able to afford a larger one that is used, however, I have no idea how big is big enough or too big. From what I've been reading I should try to find one that has fairly low RPM ability, rather than worrying about the top end RPM. What min/max distance between centers should I be looking for?
I like the idea of the lathe/mill combo a lot, but I'm a little discouraged by what I have read about them.
Thanks for your help.....................Scott
-
I talked to Grizzly again today and they said the switch was bad on the lathe so I swaped it with the mill (same type) and it worked. At least I can continue practicing with the lathe while the mill parts are being shipped.
And believe me, I need lots of practice!
Kenny
Which model number did you get? I've been looking at the Grizzly products and some that Harbor Freight sell, but I'm not sure if I should get the combo or a dedicated lathe. One thing I'm seeing is that a lot of the lathes only got down to 300rpm and it is my understanding that you use 250 rpm for a lot of the work and that you use 60 rpm for chambering. I mostly plan on doing barreling but the mill option sure is tempting. Thanks..............Scott
-
Great pics, thanks. What set up are you using for surface grinding in the mill? I've always used a ginder on the lathe. How's that new fedaral round fit in those short mag boxes?
-Don
z1r those look really nice, I was thinking of buying myself the contouring jig,bit and mandrel from Brownells to hopefully be able to accomplish the same thing with a drill press. Does removing this much metal (charger hump) necessitate a re-heat treat? Or is that area not one to worry about? What do you use to clean up the area on the sides and just below the charger hump? Can't wait to see the finished project.............Scott
-
That is lead based solder. What you are left with is a tinned surface. All you need to do is remove it with emory cloth, then re-polish and blue. Just tear off a strip and use a shoe shine motion.
Bob
Thanks Bob, I'll give that a try before I bead blast it....Scott
-
I tried that and there is still a very noticeable amount that won't come off, and I definitely don't want it in my bluing salts when the time comes. I know the acid takes the bluing off in minutes, but I've never tried taking solder off with it, and I was planning on bead blasting and therefore skipping the acid bath.I thought they used regular 50-50 solder on these, so I would think a propane torch, steel wool and some cotton rags would get the majority of it off.
-
I'm getting closer to finished on a twede project and need to know how to get the silver solder off from where the rear sight was located. Will muriatic acid take it off with the bluing? Should I just bead blast it off as the finish will be matte anyways? Will bead blasting it off make that spot a heavier matte(uneven)?
Thanks guys.......Scott
-
That is a very cool look. What type of safety and trigger will you use?
-
Who ever does your nickel plating should be able to mask any surface that you do not want plated.
Bob
Bob, thanks I was thinking of doing it myself, but maybe for just one action it would be better to send it off.
-
I want to satin nickel plate a Rem 700 magnum action to match the stainless barrel I wil be putting on it, but will the plating on the locking lugs of the bolt and lug mating area of the reciever wear through quickly leaving a headspace problem? Could I do the plating and then lap through the plating by normal lug lapping process? The plating process looks very simple but I have no experience with it and this seemed like the only problem I could foresee as Nickel would be much softer than the steel. Thanks...Scott
-
Thanks fritz, I'm thinking this will be a trial and error thing and bead blasting and bluing is looking better and better...........Scott
-
So I had a little free time this afternoon and thought to myself, I should try out that polish o ray. Great idea, mixed results. So first off I try to apply it to a couple new wheels like you would apply rouge. I've used rouge to polish knife blades with no prob. But this stuff would not go onto the wheels.
So I thought I would microwave it to get it into more of a paste and then apply it evenly to the wheels. Great, that worked pretty good. After giving it some time to set up pretty hard I started in on a garden stake barrel for practice.
It immediately became apparent that safety glasses alone would be completely inadequate due to the numerous high velocity projectiles hitting my face, quite painfully I might add. So on goes the full face shield and I'm off and running.
Next thing I realize is that this is not going to be as easy as knives. I was using 400 grit and it seems very difficult to get an even polish, especially over a long length of barrel. It did remove the old bluing quickly and was fairly quick at bringing out a higher polish than the military finish, but it's difficult to achieve the even polish I was expecting. I'm thinking that part will get easier with practice.
However, I have three questions. 1. What is the easiest way to get the polish onto the wheel? 2. How much do you apply? 3. Do you wait for it to harden completely and use a piece of scrap metal to make a couple passes? Thanks for your help......................Scott

Nickel Plate
in metal restoration, processes
Posted
Well I tried it and really would not recommend it. The plate should be a solid 5mils and just about the time it looks right is when the plate begins peeling off.
I ended up stripping off the plate from the bolt and recoil lug and then blasting it with a coarse grit glass and replating. I am waiting to see how they turn out before I strip down the receiver and other parts.
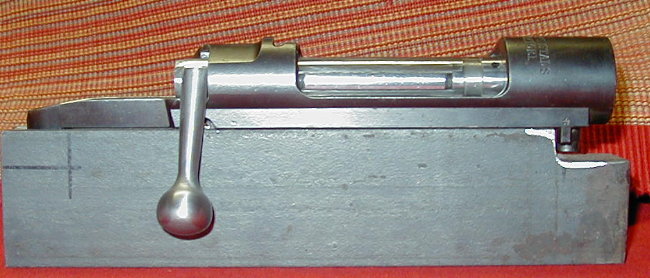
I was able to blast the receiver and cocking piece pretty aggressively and it didn't go through so we'll see. Bottom line is, don't try this unless you are prepared to do it all over as you will most likely go through the plate. I'll post more pics as they become available, this pick is the receiver after blasting, still too bright in my opinion. The areas that look rough are an illusion, it is all smooth, just came out weird in the pic.
I'm hoping I can find some combo that works as I am wanting to use arem 700 stainless barrel on a turk action.......................Scott