Horsefly Posted February 7, 2022 Report Share Posted February 7, 2022 I’ve never done it ,but now with the cost and rarity of affordable barrels it’s something I have to do. I’d like to hear what you cats use and what equipment it takes to coat a rifle. I have a typical 1908 Brazilian pitted barrel outside with new looking riflings. My first 1908 wasn’t so nice inside ,but outside the pits filed out. This one way better inside but with deeper pits. The first turned out to be a nail driver, so have high hopes for this’un too. I will build curing ovens or anything it takes for a good finish. Just need you dudes tutoring. Oh ya, brand names for finishes needed too. Thanks,Jerry. Quote Link to comment Share on other sites More sharing options...
Racepres Posted February 7, 2022 Report Share Posted February 7, 2022 Appliance paint on the last one... Fugly, but.. inexpensive and fast... covers all Uglies!!! I Hate Shiney tho, so experimenting now with knocking the shine off with steel wool..... Quote Link to comment Share on other sites More sharing options...
Dr.Hess Posted February 7, 2022 Report Share Posted February 7, 2022 For cheap, yeah, rustoleum brand appliance epoxy. Tough, too, but only available in black or white. For best results, I warm up whatever it is in the oven, long enough for any and all oil to stop smoking off. Even after super degreasing, there's always more in the pores, it seems. Brake clean it off, warm it and spray it when still warm. It will have less shine. After spraying and letting it air dry, hang it up in the oven and bake it at like 250F until it stops stinking. For regular storebought, Brownells alumahyde https://www.brownells.com/gunsmith-tools-supplies/metal-prep-coloring/paint-finishes/air-cure-aerosol-paints/aluma-hyde-ii-prod1117.aspx looks pretty good, but I have not tried it. Quote Link to comment Share on other sites More sharing options...
sonic1 Posted February 7, 2022 Report Share Posted February 7, 2022 i've used this with good results..................https://www.midwayusa.com/product/1841126826?pid=898628 Quote Link to comment Share on other sites More sharing options...
manureman Posted February 8, 2022 Report Share Posted February 8, 2022 Jerry I can’t help with the pits but I like Brownells Teflon molly . But a heads up on curing ovens…. The first one I did in our kitchen oven . The barreled receiver was to long to get the door closed completely but I read that you could use tinfoil hanging off the top of the stove and kind of tent it around and make it work. The Gun turned out great. The Stove not so much… The heat coming up under the foil warped the snot out of a bunch of plastic trim and do-dad’s. Momma was not happy. I was able to replace it all but lesson learned. What I ended up with was a old used electric stove I bought at a yard sale for $20.00, built a angle iron frame for it to set on with cheap Harbor Freight casters, cut the range plug off and put a welder plug on it and it’s up in my shop. I can roll it around and use the top burners for parkerizing , canning pickles, frying fish and squirrels and taters when we need something to soak up beer and it keeps everyone out of the house. I had planned on cutting a hole in one or both sides and rigging up flue pipe or something where I could close the oven door but tinfoil is to cheap and easy and this old stove is all metal with the knobs up on the back , works great and handy for things I never thought about till I got it. I’ve read about folks using JB weld under spray on finishes to fill pits but ain’t tried it myself. Quote Link to comment Share on other sites More sharing options...
AckleyFan Posted February 28, 2022 Report Share Posted February 28, 2022 For the price of one Cerakote job I purchased all the tidbits needed to spray it myself - Amazon has everything including the Cerakote. This rig has paid for itself several times over, is very easy to use and the results are as good as any "professional" job if you take your time and inspect your work. You only need a thimble full of Cerakote to coat a barreled action, bases, bolt and other small parts as desired. It takes a bit of math to calculate the proportions needed, but those plastic syringes make it easy to do in small quantities. Do not mix the quantity that the manufacturer recommends or you'll waste most of the product. I spray outside on my patio with a piece of cardboard as a wind-break, pre-fit the barreled action in the oven with the hangers created and ready to go. Do not pre-heat your oven, voice of experience talking... Quote Link to comment Share on other sites More sharing options...
Dr.Hess Posted February 28, 2022 Report Share Posted February 28, 2022 The Paasche is the top name in air brushes. I see that one is the single action. That's fine for this type of work. I have the identical model, bought 35 years ago. The little metal cup is what I usually use. I find it is also handy for spraying on stock finish. Comes out perfect. Quote Link to comment Share on other sites More sharing options...
swamp_thing Posted March 12, 2022 Report Share Posted March 12, 2022 I will also have to give rustoleum enamel a thumbs up. I use it on amp chassis. Spray a heavy coat on, place it in cold oven immediately and bake to 300 degrees. Their website says it can be baked to 350 degrees. Leave it in oven and shut off heat after about 20 minutes. Do not remove until oven has cooled back down. Makes a very smooth hard finish. Works for me but your mileage may vary. Might want lighter coat on gun so it doesnt run off. Quote Link to comment Share on other sites More sharing options...
Jeremy Posted June 10, 2022 Report Share Posted June 10, 2022 I'm replying to this topic because I didn't want to start a new one covering the same subject. I too have been considering painting one of my barreled 1893 actions. It is seriously pitted above the wood line and below the wood line. The ring hasn't been compromised with a crack so I think that is a great candidate for such a restoration project. The barrel is in better shape with good sharp rifling and is chambered for 7x57. I have 5 other sporters that I have built on the same platform. It would be a shame to de-mill it. So I'll give this method of restoration and sporterizing a try. I like all of the ideas that have been posted. Thank you all for sharing. These are my 5 Spanish ladies that I built. Quote Link to comment Share on other sites More sharing options...
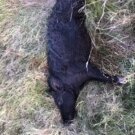
Jeremy Posted June 10, 2022 Report Share Posted June 10, 2022 Here is a picture of my candidate. Quote Link to comment Share on other sites More sharing options...
Dr.Hess Posted June 10, 2022 Report Share Posted June 10, 2022 I'd shoot that without concern. I, too, like the small ring in 7x57. I've sort of adopted that caliber as my standard for making things. I have go, no-go, and a couple reamers in that. Quote Link to comment Share on other sites More sharing options...
Horsefly Posted June 11, 2022 Author Report Share Posted June 11, 2022 Yep! That’ll make a fine rifle. I’m doing a 93 Turk in 6.5 Swede and a 1908 Brazilian with crazy pitting barrel at forearm but inside barrel looks showroom perfect. It’s still 7x57. Just finished a Chilean 95 couple months ago. First Chilean I had that had no pitting. Quote Link to comment Share on other sites More sharing options...
Jeremy Posted June 11, 2022 Report Share Posted June 11, 2022 20 hours ago, Dr.Hess said: I'd shoot that without concern. I, too, like the small ring in 7x57. I've sort of adopted that caliber as my standard for making things. I have go, no-go, and a couple reamers in that. That is my plan. I too have a set of head space gauges for 7x57 just no reamers. Four out of my five Spanish ladies are 7x57 and one is 7.62. Quote Link to comment Share on other sites More sharing options...
AzRednek Posted June 28, 2022 Report Share Posted June 28, 2022 For what it’s worth. I have a Peruvian 1891 Mauser. Other than the Gew 88 type rear sight and slightly different hand guard. It’s the same as an Argie 91. Despite the Peruvian crest it’s stamped Mauser Modelo Argintino. The exterior is severely pitted but the bore is bright and shiny. Obviously the barrel was re-lined and it is an excellent shooter. The Peru arsenal painted the exterior with black paint of some sort. I’ve had the rifle since the mid 70s. From what I read years ago, it might have been on the Springfield Sporters Shotgun News ad. The refurb was done in the late 50s. Wish I knew what kind of paint was used. From the 50s era it is likely lead based paint. The very hard paint did put the brakes on the rust and pits. In the late 70s I had some experience with lead based paint before it was illegal. I had a horrible job as a mechanic for Neumann Clark. Anything from small to very large forklifts, industrial and farm equipment. As the govt regs kicked in we could still use the lead based green and blue factory enamel colors still in stock. Naturally the factory increased production before the regulations started. The regs prohibited adding tint or changing the color. Best we could do was swap our factory green or blue for Caterpillar yellow or Masey Ferguson red. I didn’t use any of the paint personally but other employees used the lead based paint on their pickups, camper shells, trailers and cars. The lead based paint was as hard as rocks, one could bounce tools off it. It was dam near impossible to scratch it, grease and oil was easily cleaned off. I never got involved with any spray painting. They used to put the paint jobs into a booth with infrared lights to dry. Not really baked on but there was some heat involved curing the paint. As far as prep the equipment was steam cleaned with a very potent detergent. There was a technique used for a second coat I’m not sure of. I think the second coat went on when the first coat was tacky, not wet or dry. I didn’t see it but was told somebody tried clear coating a paint job. The clear coat didn’t stick, had numerous runs while wet and it was easily peeled off after it dried. I did see one paint job that he first used rubbing compound then DuPont #7 auto polish and he got some shine to the dull flat paint job. I once had a job for about six weeks in a paint store. 90% of what we sold was Latex house paint. We did sell some oil based enamel paint with an epoxy that dried very hard. I used a small amount on some near rotten sun bleached wood trim and it did dry very hard. According to the old man I worked with, with 20+ years in the paint business. He said it was a substitute for lead based enamel and unlike lead based paint it was available in semi-gloss. The epoxy paint worked well on wood but I have no idea how well it works on metal. Quote Link to comment Share on other sites More sharing options...
Recommended Posts
Join the conversation
You can post now and register later. If you have an account, sign in now to post with your account.